
Learn - Shopping Lists
A list that prices itself from what you actually buy.
Shopping Lists
A shopping list is a list you check off as you shop, kept inside one budget. As you add items, the list totals your basket before you leave the house, groups itself into aisles, and works out whether one stop or a split trip costs you less. After you shop, the receipt you scan checks the matched items off and records what you actually paid. Everything on this page is free and none of it uses AI.
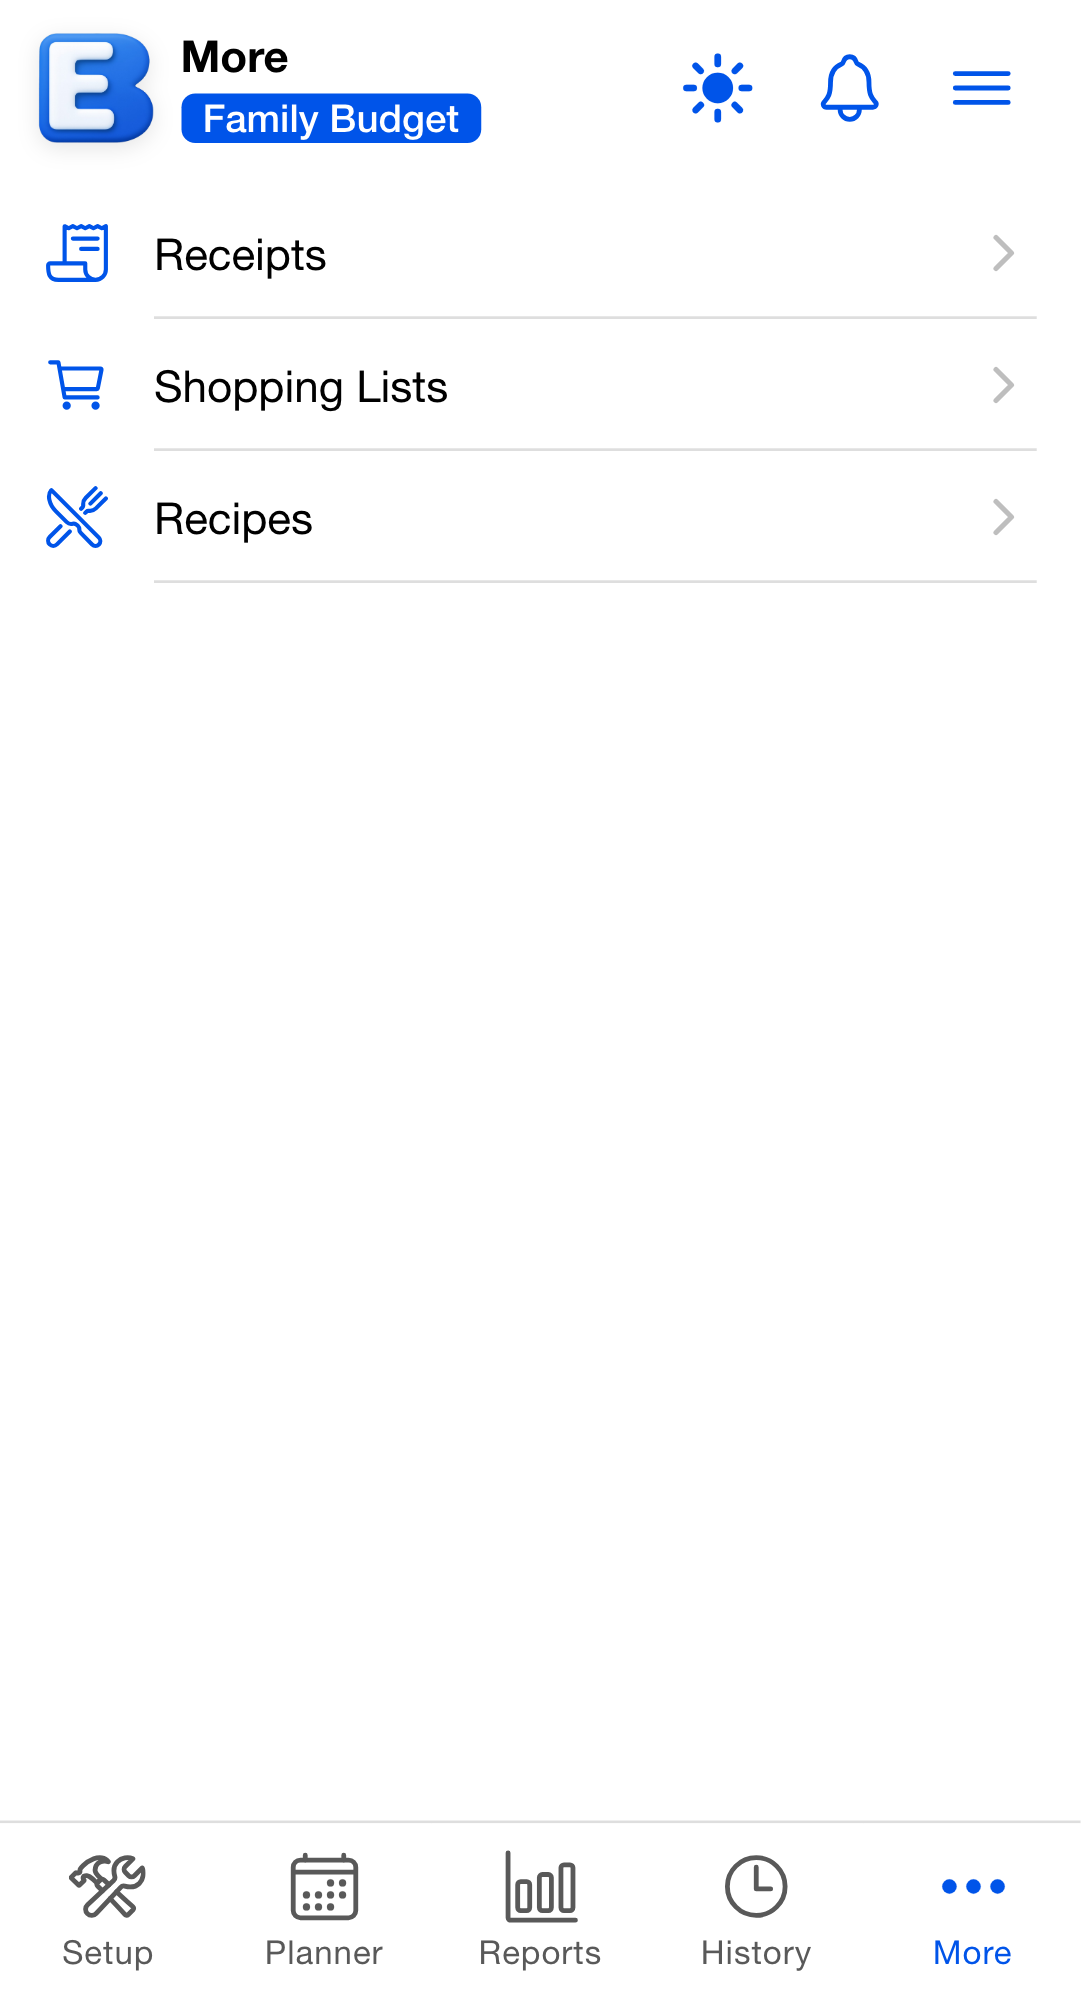
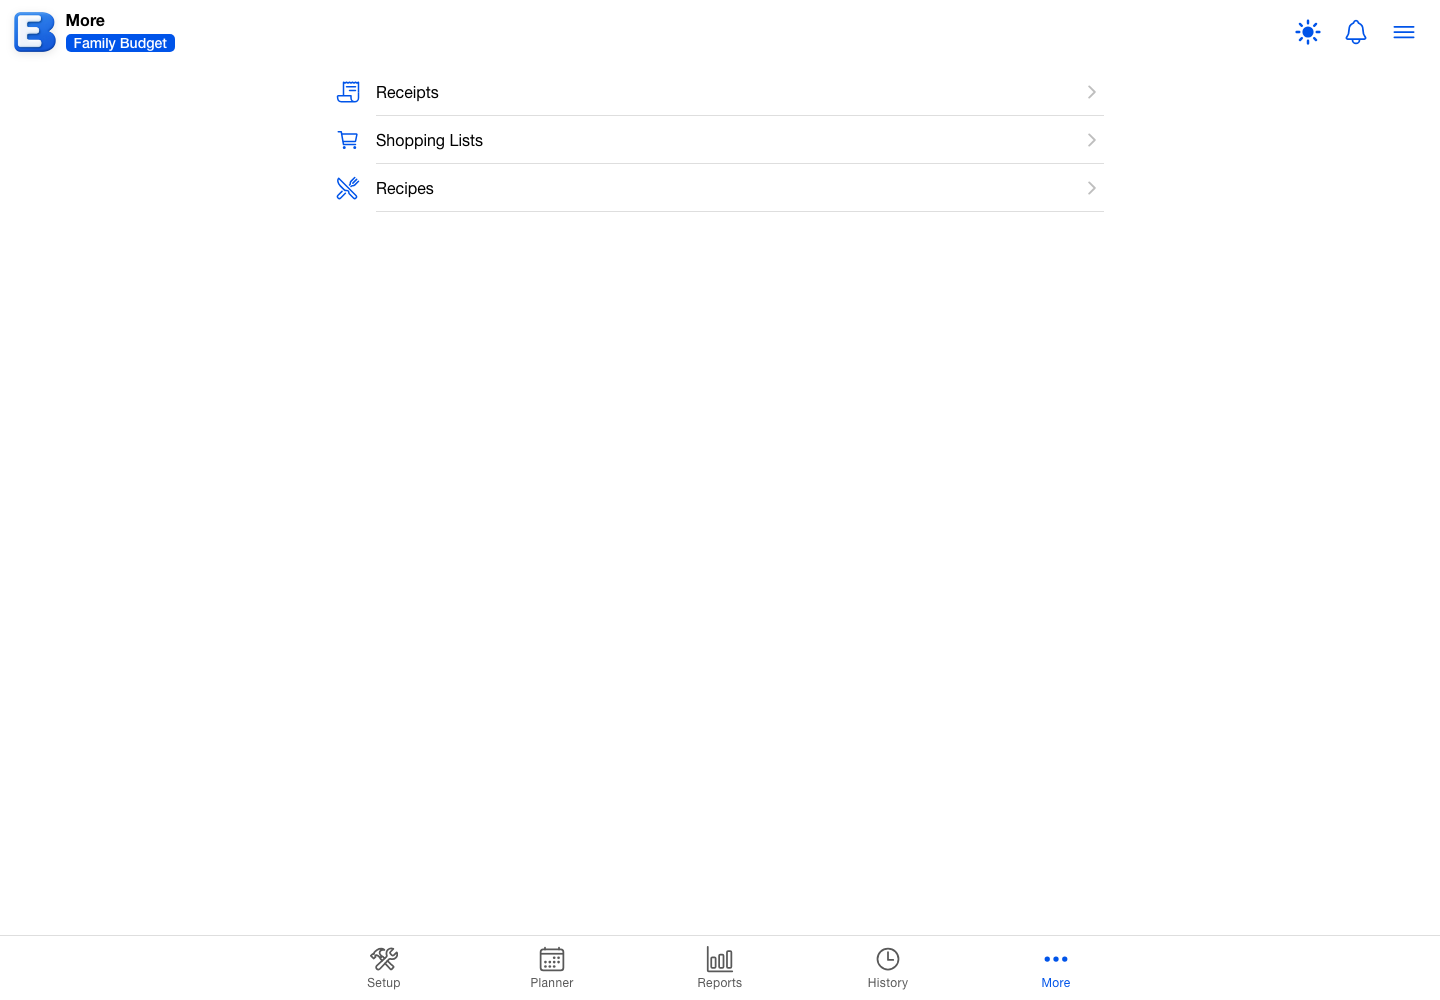
Shopping lists live on the budget More screen, alongside Receipts and Recipes. Open a budget, tap More in the bottom tabs, then tap Shopping Lists. In a budget created from receipts, the More screen lists History, Shopping Lists, and Recipes, because Receipts has its own tab. Keep as many lists in a budget as you like: a weekly grocery list, a hardware-store run, a party list.
A list works on day one with nothing scanned. You add items and check them off like any list, and rows with no price simply show no price. The totals, the aisle grouping and the trip plan fill themselves in as your receipts build up, and none of them ever shows a made-up zero.
Creating and managing lists
The Shopping Lists screen shows every list in this budget, each row carrying its name and how many items are on it. Tap the chevron at the end of a row to open that list. A tap on the row itself does not open it, so a stray tap never interrupts a swipe or a drag.
To make a list, tap the + button at the top right, labeled New shopping list. On an empty screen, tap Create your first list instead. Either one opens the New shopping list dialog, which asks for a List name; type it and tap Save.
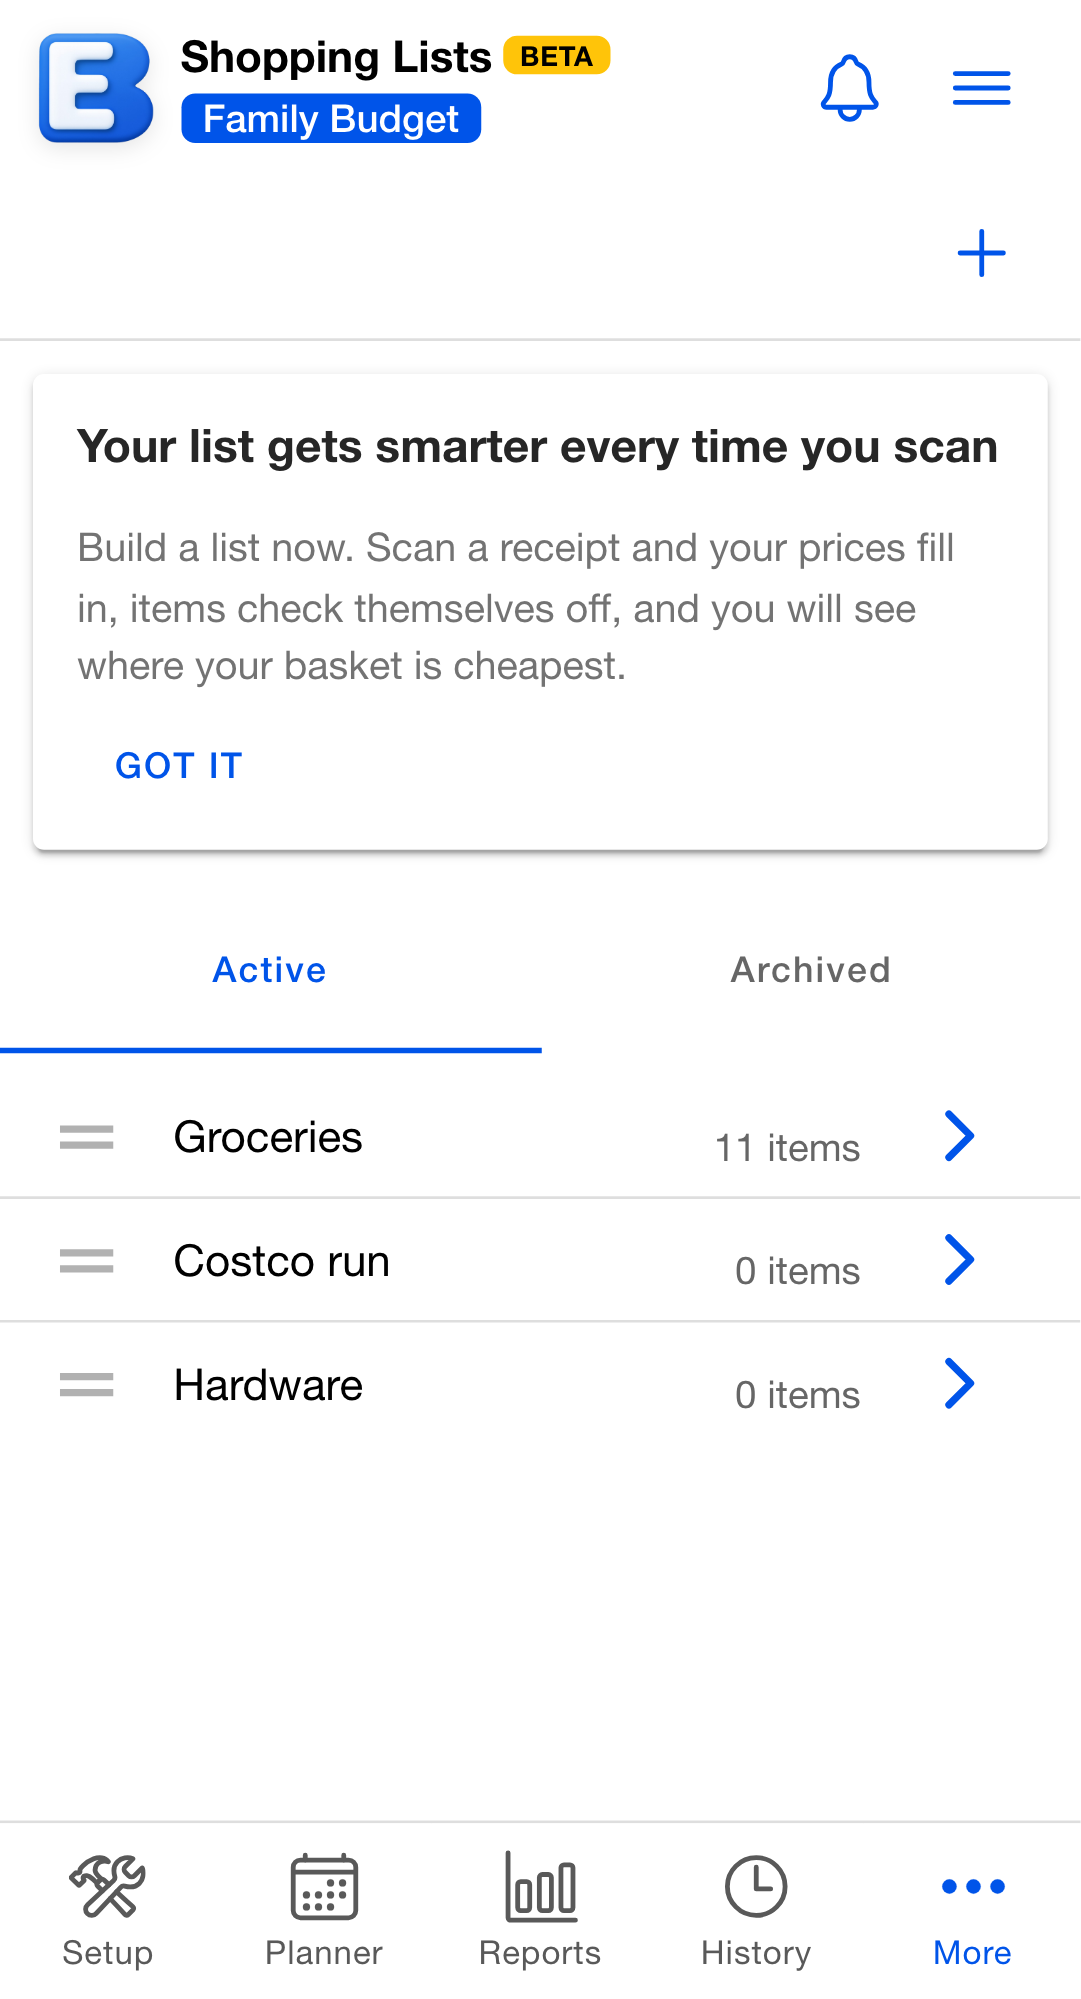
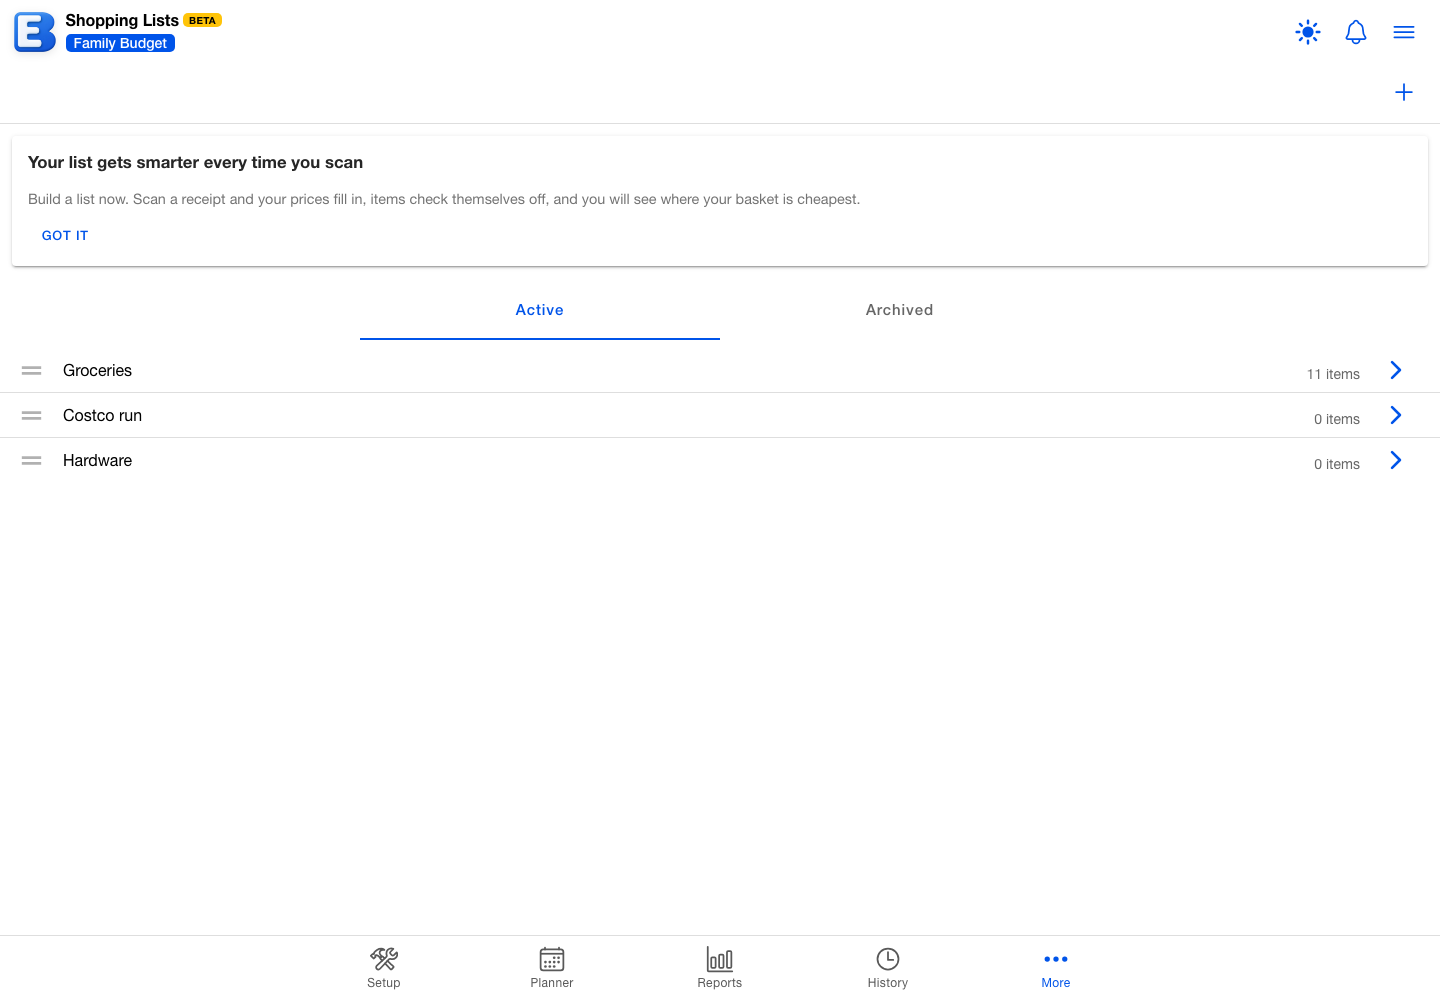
Swipe a list row to the left for three actions:
- Rename opens the Rename list dialog with the current name filled in.
- Archive moves a list you are done with out of the way without deleting it. On the Archived tab the same action reads Restore.
- Delete removes the list and everything on it.
Deleting from the row happens straight away, with no confirmation and no undo. Deleting from inside the list is the safer route: the trash button at the top, labeled Delete list, asks first, in a dialog that names the list. Either way the list is gone for good, so archive a list you might want back.
Why archive instead of delete? Last week’s grocery list is a record of what you bought, and you can re-add any of it later from Past receipts. Archiving tucks the list behind the Archived tab so your active lists stay short, and keeps everything on it. Deleting is for lists you truly do not want.
Once at least one list is archived, an Active / Archived toggle appears at the top so you can switch between the two. To reorder your active lists, press and hold the handle at the left of a row and drag it. The new order is saved for everyone on the budget. Archived lists cannot be reordered.
Adding items
Open a list and type in the Add an item bar at the bottom. Press the return key, or tap the + beside the bar, to add what you typed. The item appears in the list right away.
As you type, the bar suggests up to eight products from your own shopping history, most-bought first. The suggestions come only from products you have actually bought on past receipts, never from a general grocery catalog, because a list is personal and is not always groceries. When the receipt recorded an aisle for a product, the suggestion shows it. When you tap a suggestion, the new row arrives already knowing its product, so it groups and prices itself immediately.
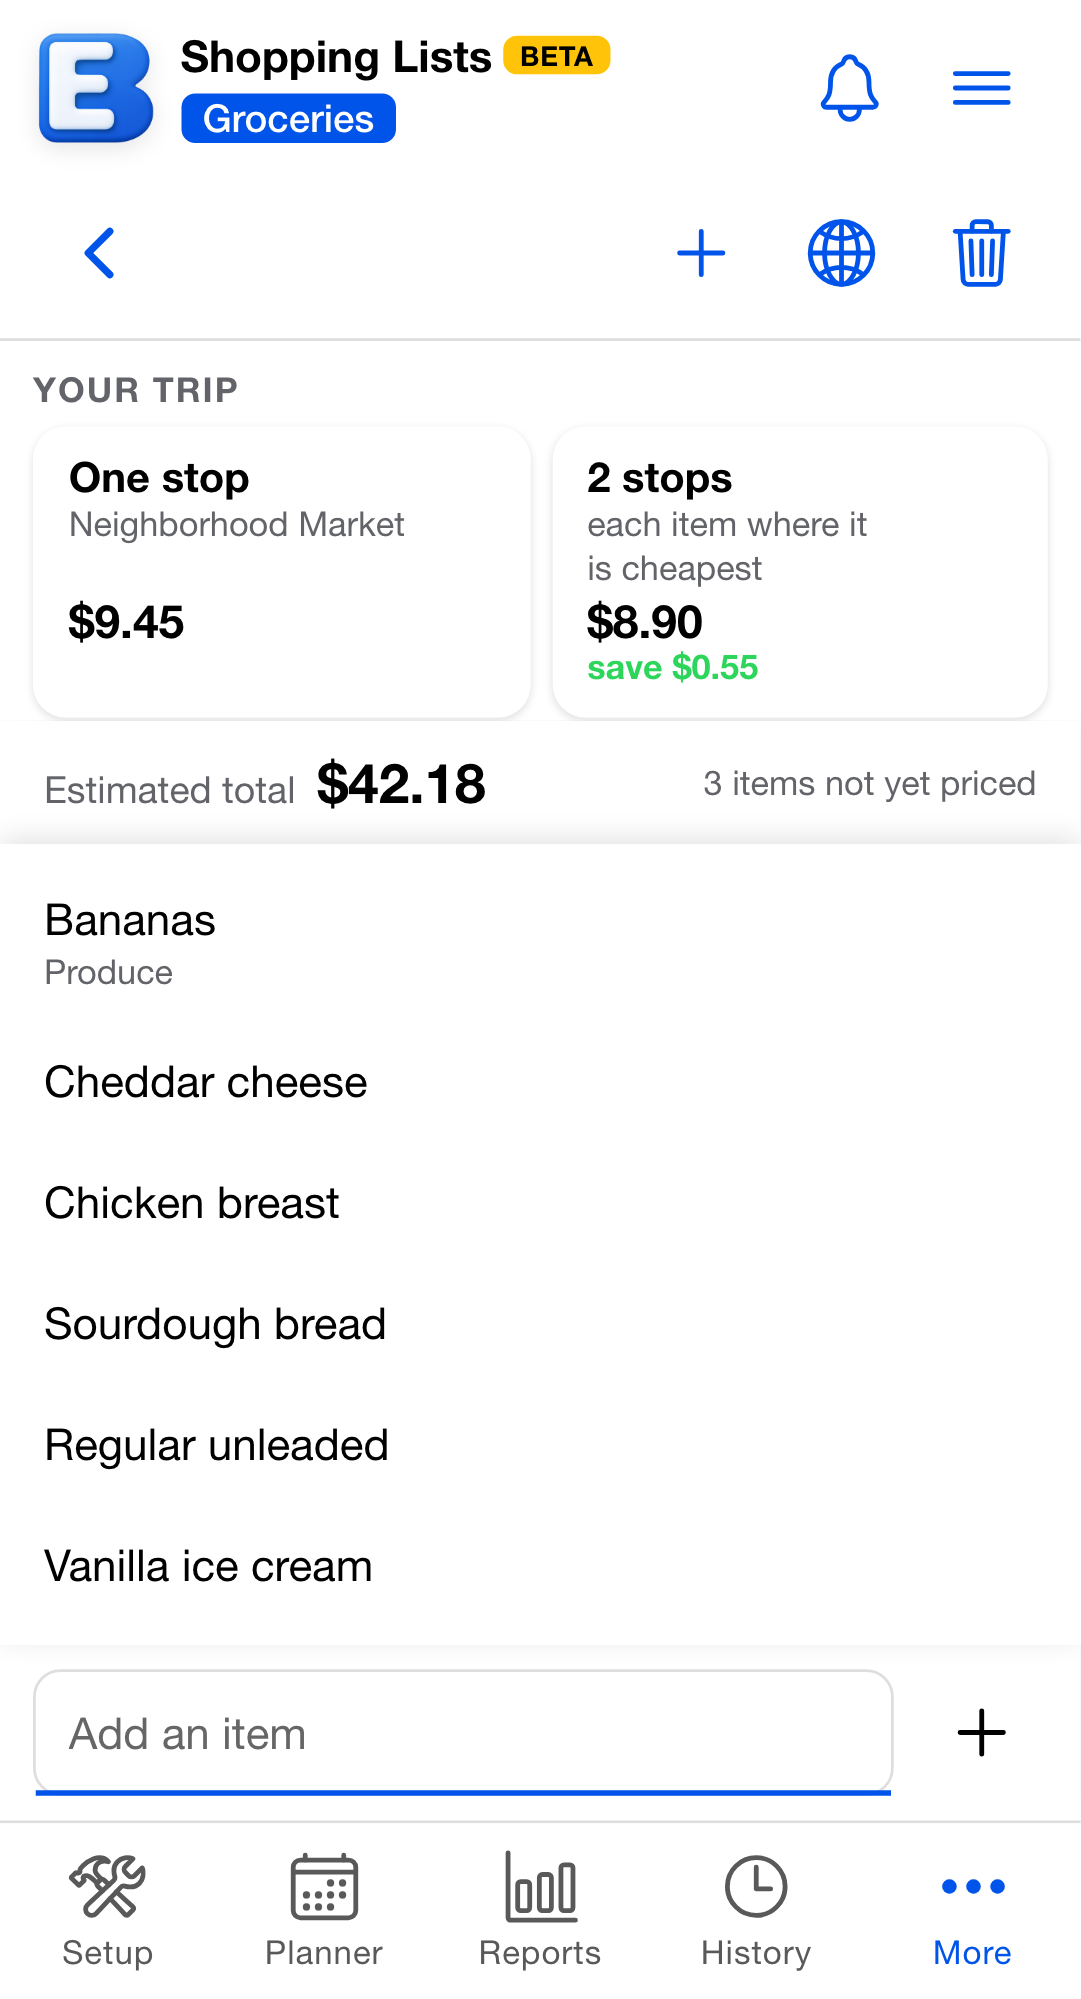
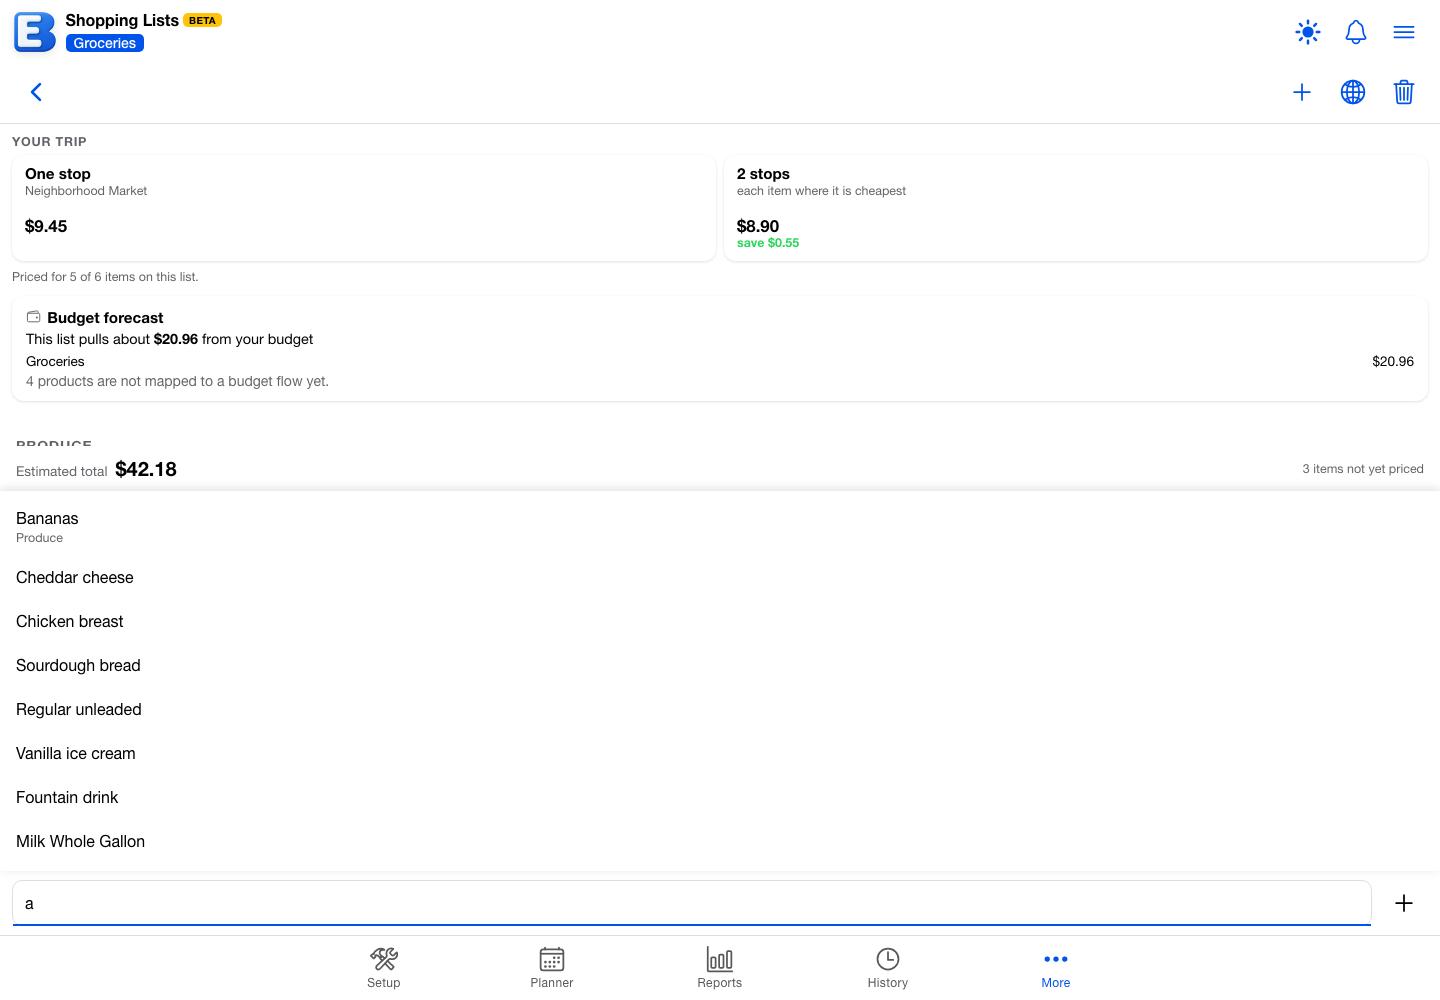
If nothing in your history matches, the bar stays quiet and adds exactly the text you typed. A typed item can still price itself, but only when what you typed names a product the app recognizes, like “milk” or “bread”. Something more specific, like “the good sourdough”, is added as written and stays unpriced. Tapping a suggestion always carries the product across, which is why it is the surer route to a priced row.
To change an item, tap its row. The Edit Product dialog holds five fields:
- Name, which is also what the app matches against your receipts.
- Quantity, which multiplies the price on the row and in the basket total.
- Set a price (optional), covered below.
- Note, for a brand or a size. It does not affect any total.
- Budget flow, which appears only for a product the app recognizes. Picking a flow here takes effect immediately, with no separate save, and feeds the budget forecast.
The quantity shows on the row whenever it is not exactly one, and whenever the item has a unit, so a single gallon of milk reads “1 gal”.
To remove one item, swipe its row to the left and tap Delete. Like deleting a list from its row, this happens straight away.
Checking off and aisle grouping
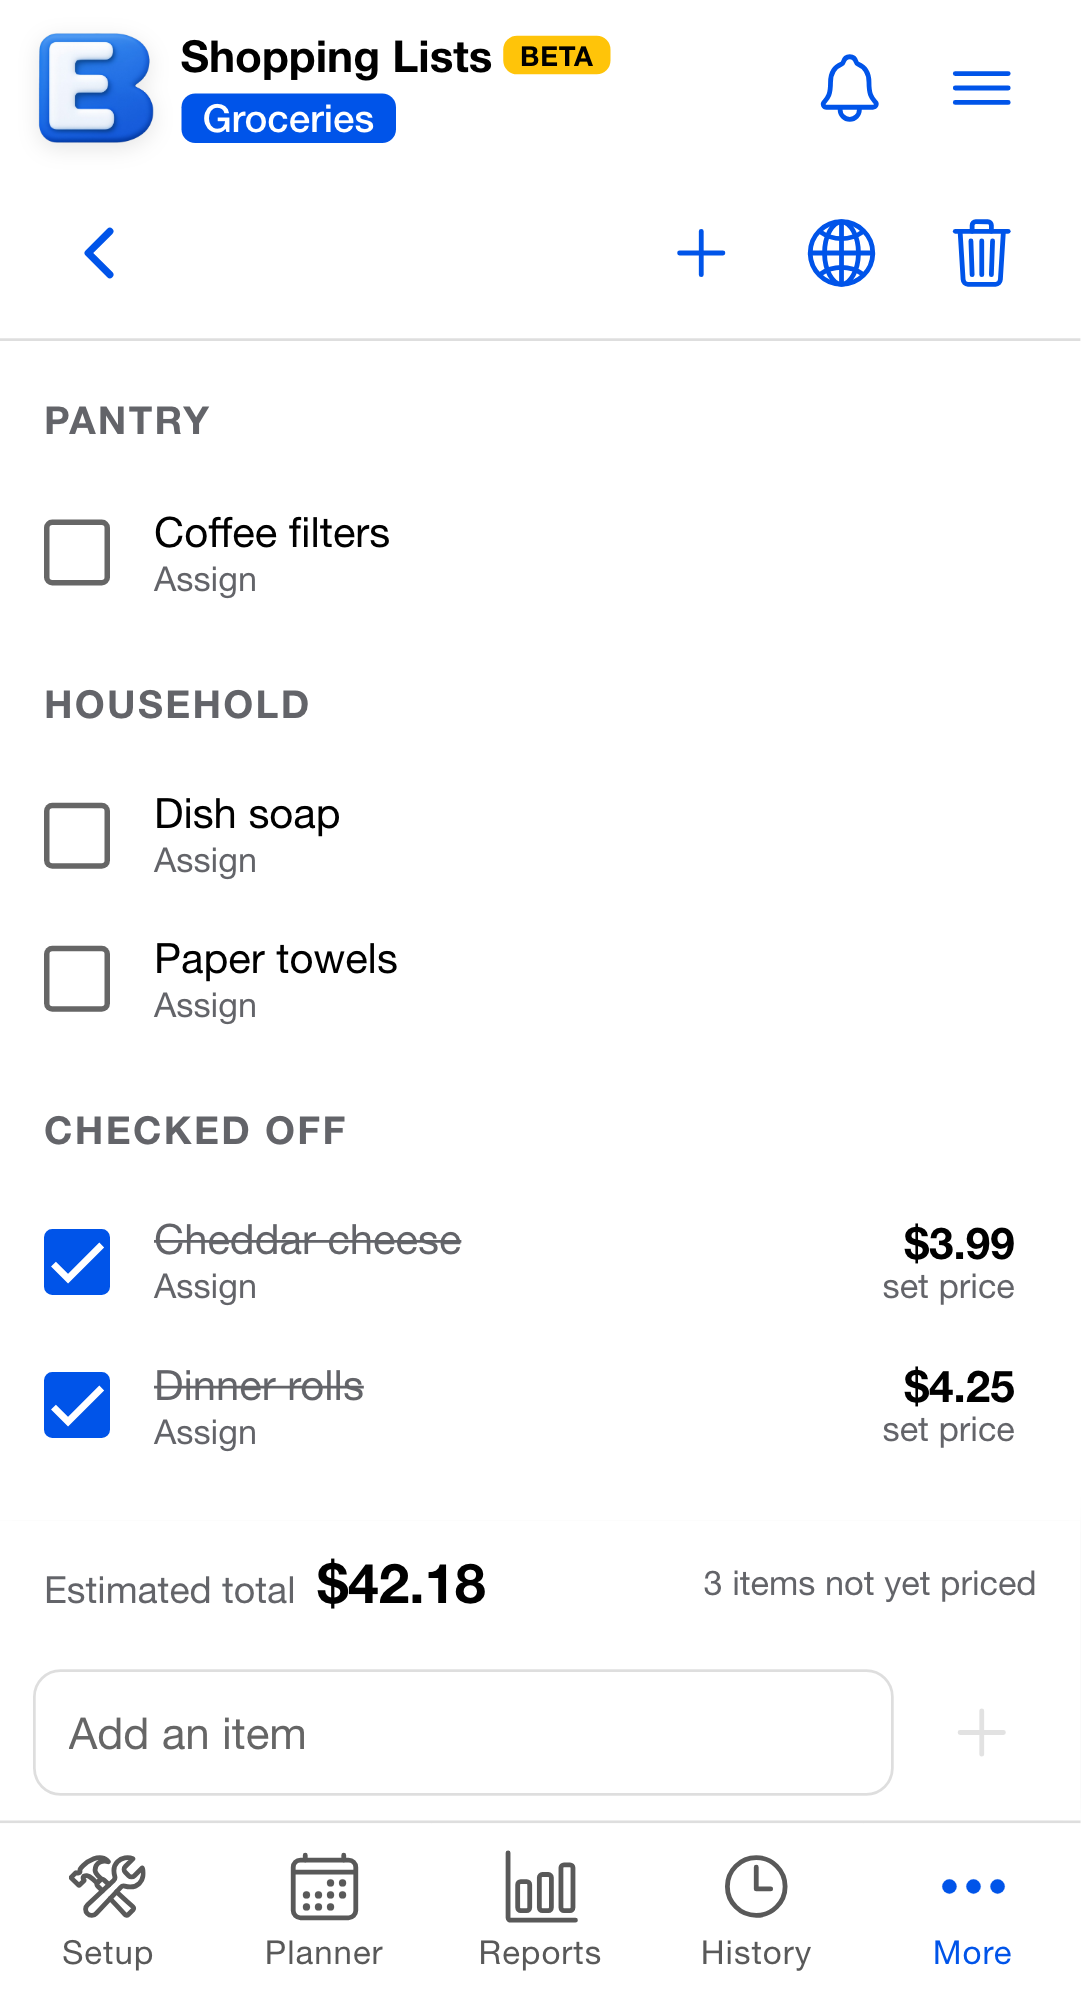
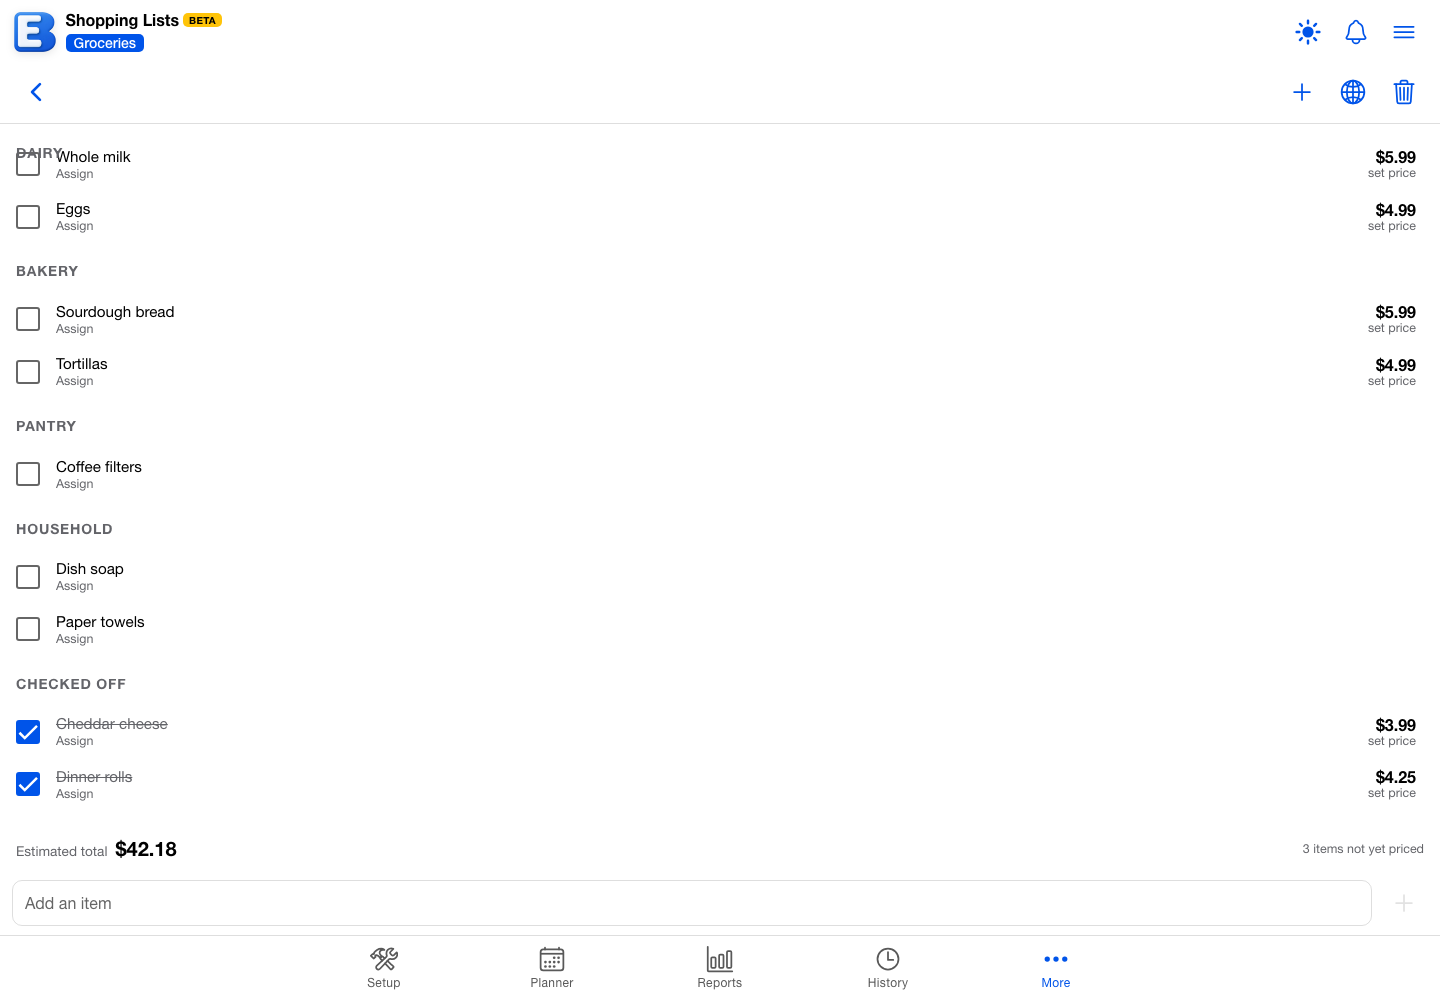
Tap the checkbox at the left of a row to check an item off. Checked items move to a Checked off group at the bottom, so what is left to grab stays at the top, the way a paper list gets crossed out. Checking an item off does not change the basket total.
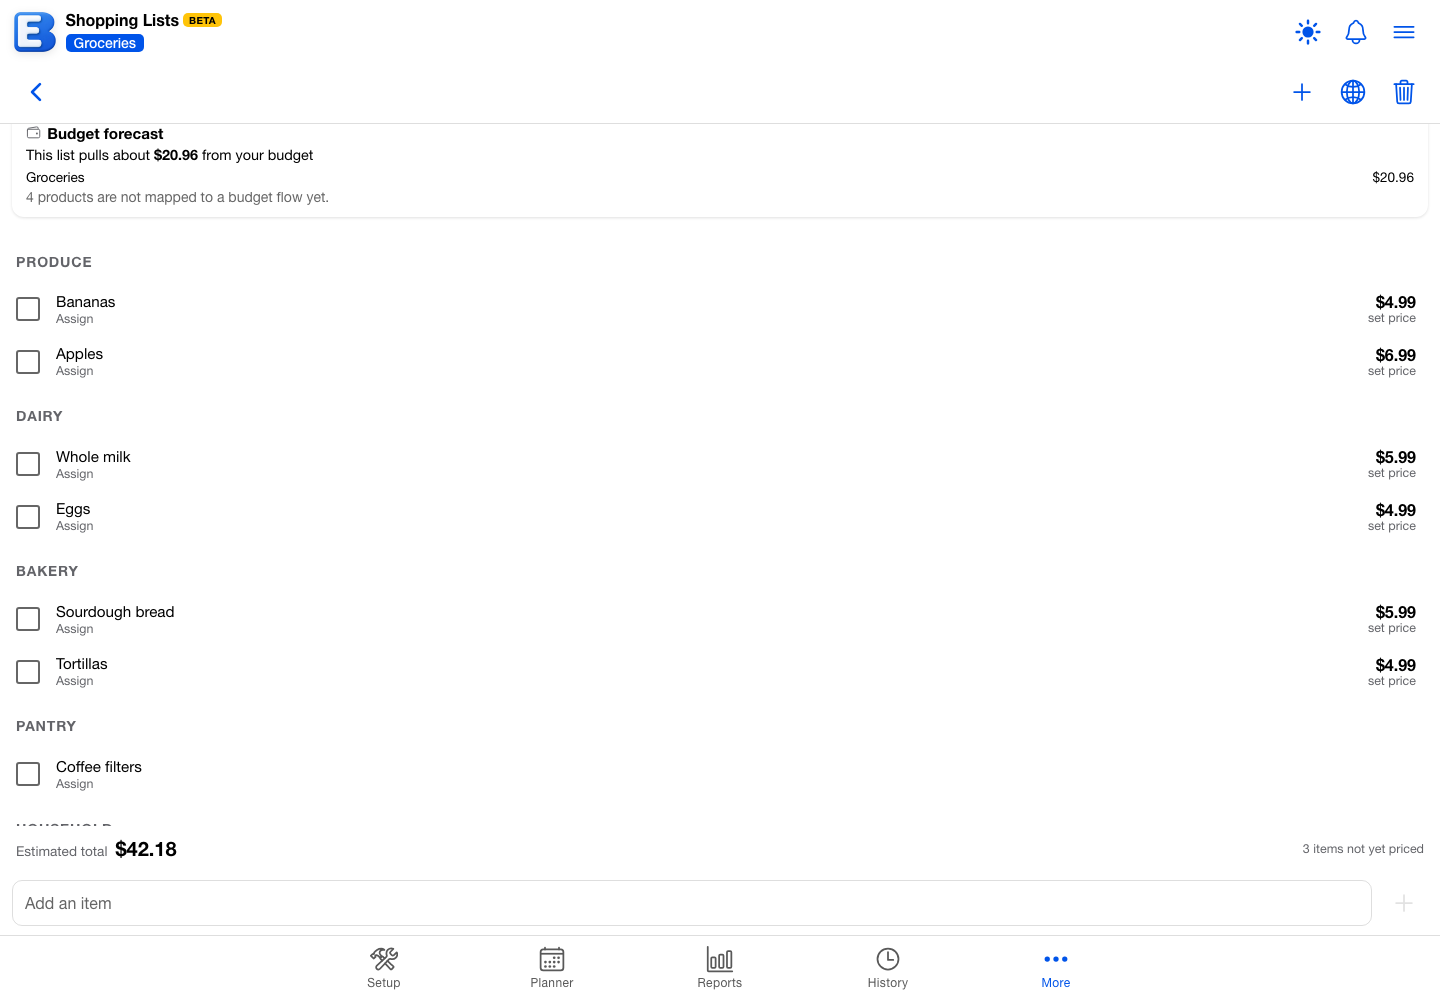
Items are grouped into aisle sections, using the aisle each product was recorded under on your receipts. An item the app has no aisle for sits under an Other section at the end. The aisle fills in once you have scanned a receipt that includes that product, so a brand-new item can start under Other and move to its aisle later.
How prices appear
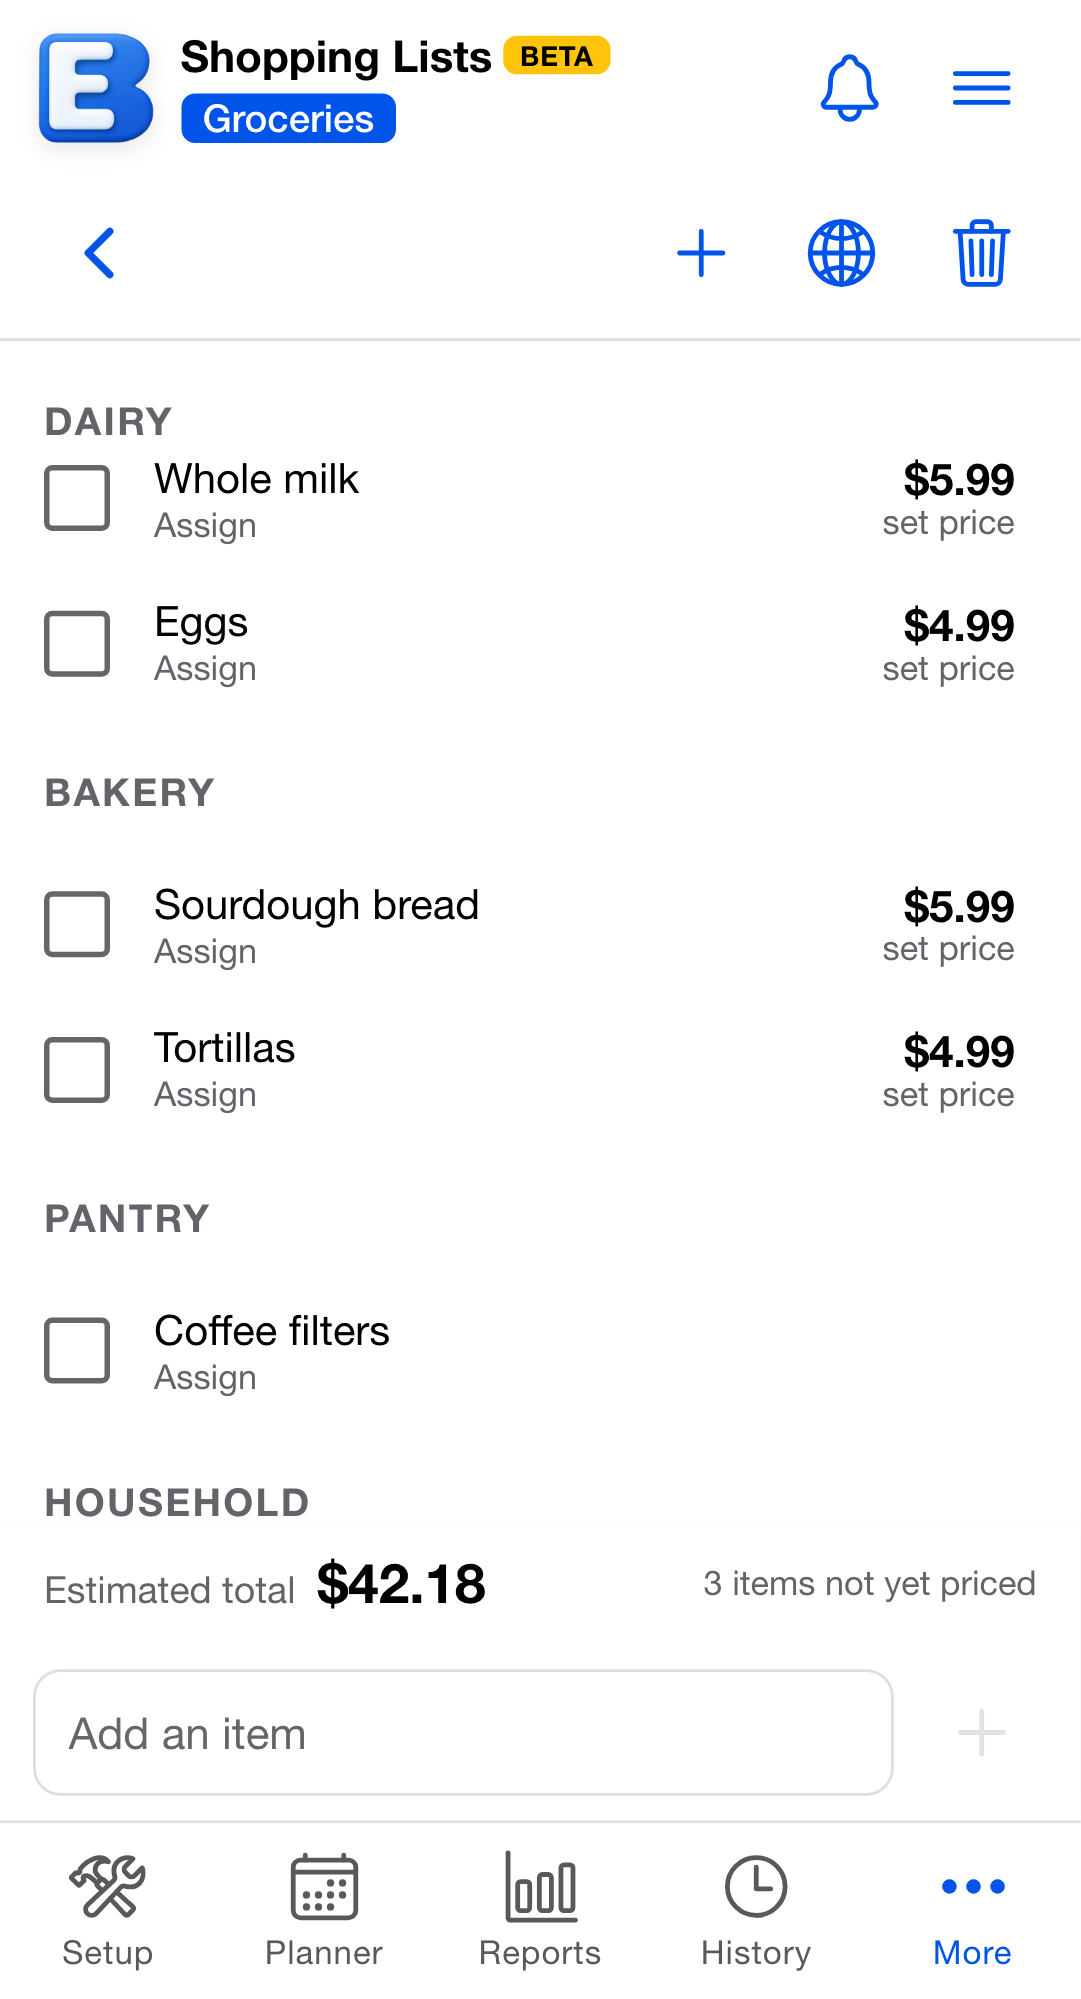
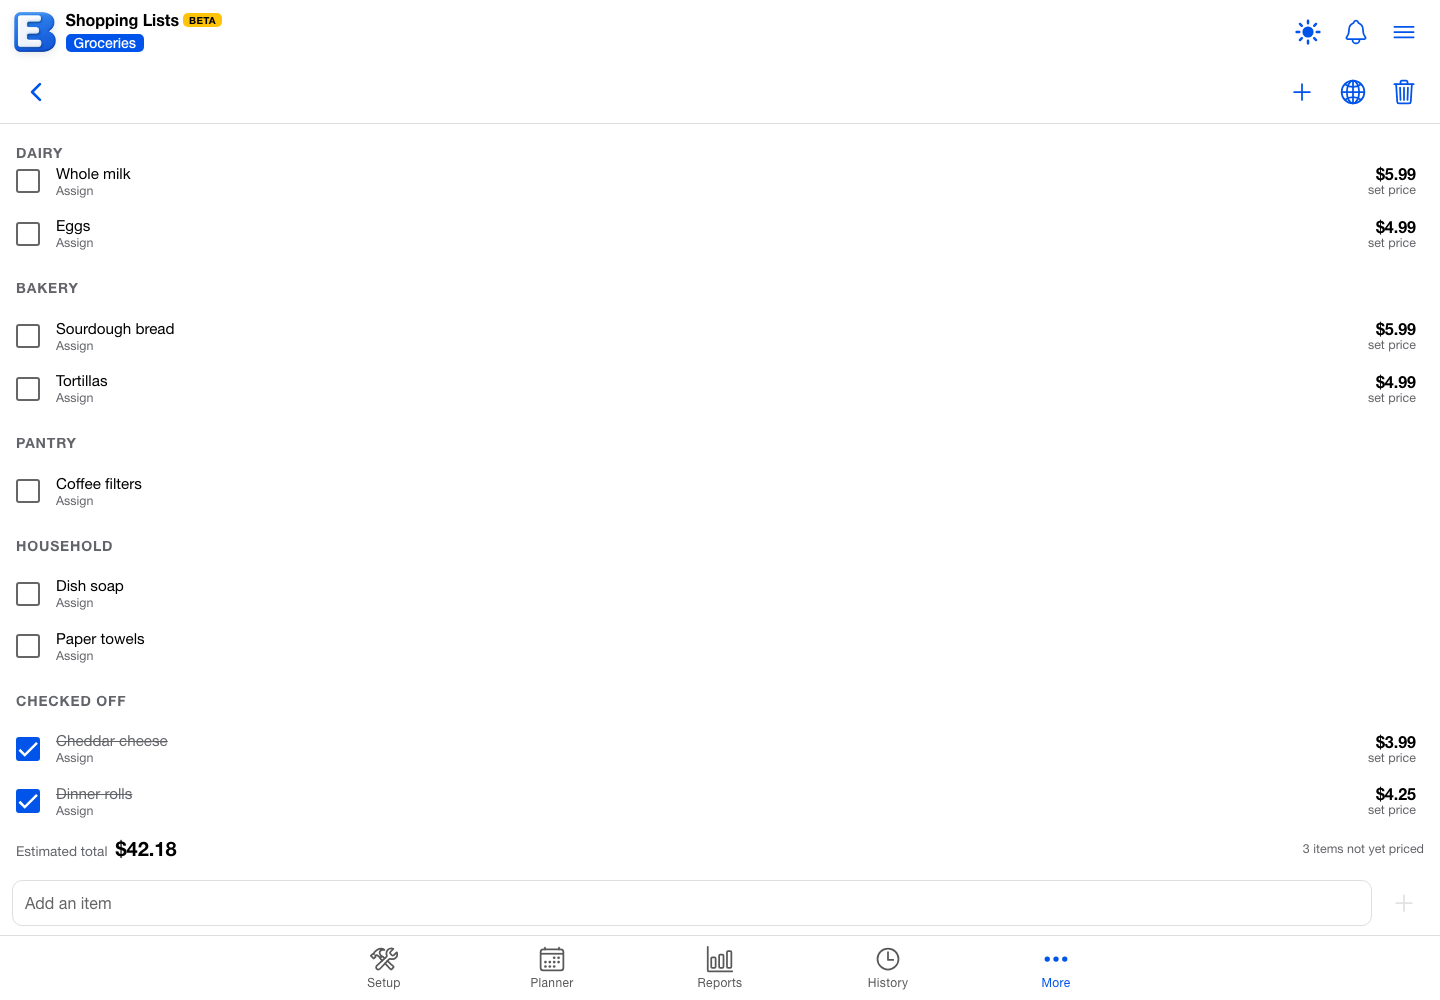
Each priced row shows an estimate at the right, with a short label saying where the estimate came from:
- your price is the typical price you have paid for that product, taken from your own receipts.
- A community estimate carries a
~and one of near you, in your area, in your state, or nationally. It is used when you have not bought the product yourself yet, and it appears only if you take part in community prices and have saved your area. See Community Prices. - set price is a price you typed in yourself.
A price you typed wins over everything else until you clear it. Otherwise your own history wins, and a community estimate is the fallback.
When your most recent price for a product runs more than 15% above your usual price for it, the row reads above usual in place of the source label, so a pricey week stands out. That comparison needs at least three purchases behind it, so one unusual trip does not trigger it, and it is only ever made against your own history, never against a community estimate.
A row the app cannot price yet shows no price at all.
Why does an unpriced row show nothing rather than $0.00? A made-up zero would quietly corrupt your basket total and your trip plan. Until the app has either a price you have paid, a price you typed, or a community estimate, the row is simply a row, and the total beneath says how many items are still in that state. Every number you see on a list is a real estimate.
Setting a price by hand
To get a basket total before you have scanned anything, open an item and fill in Set a price (optional). That price counts toward the basket total and the row is labeled set price. Clear the field to go back to the estimate from your receipts.
The basket total
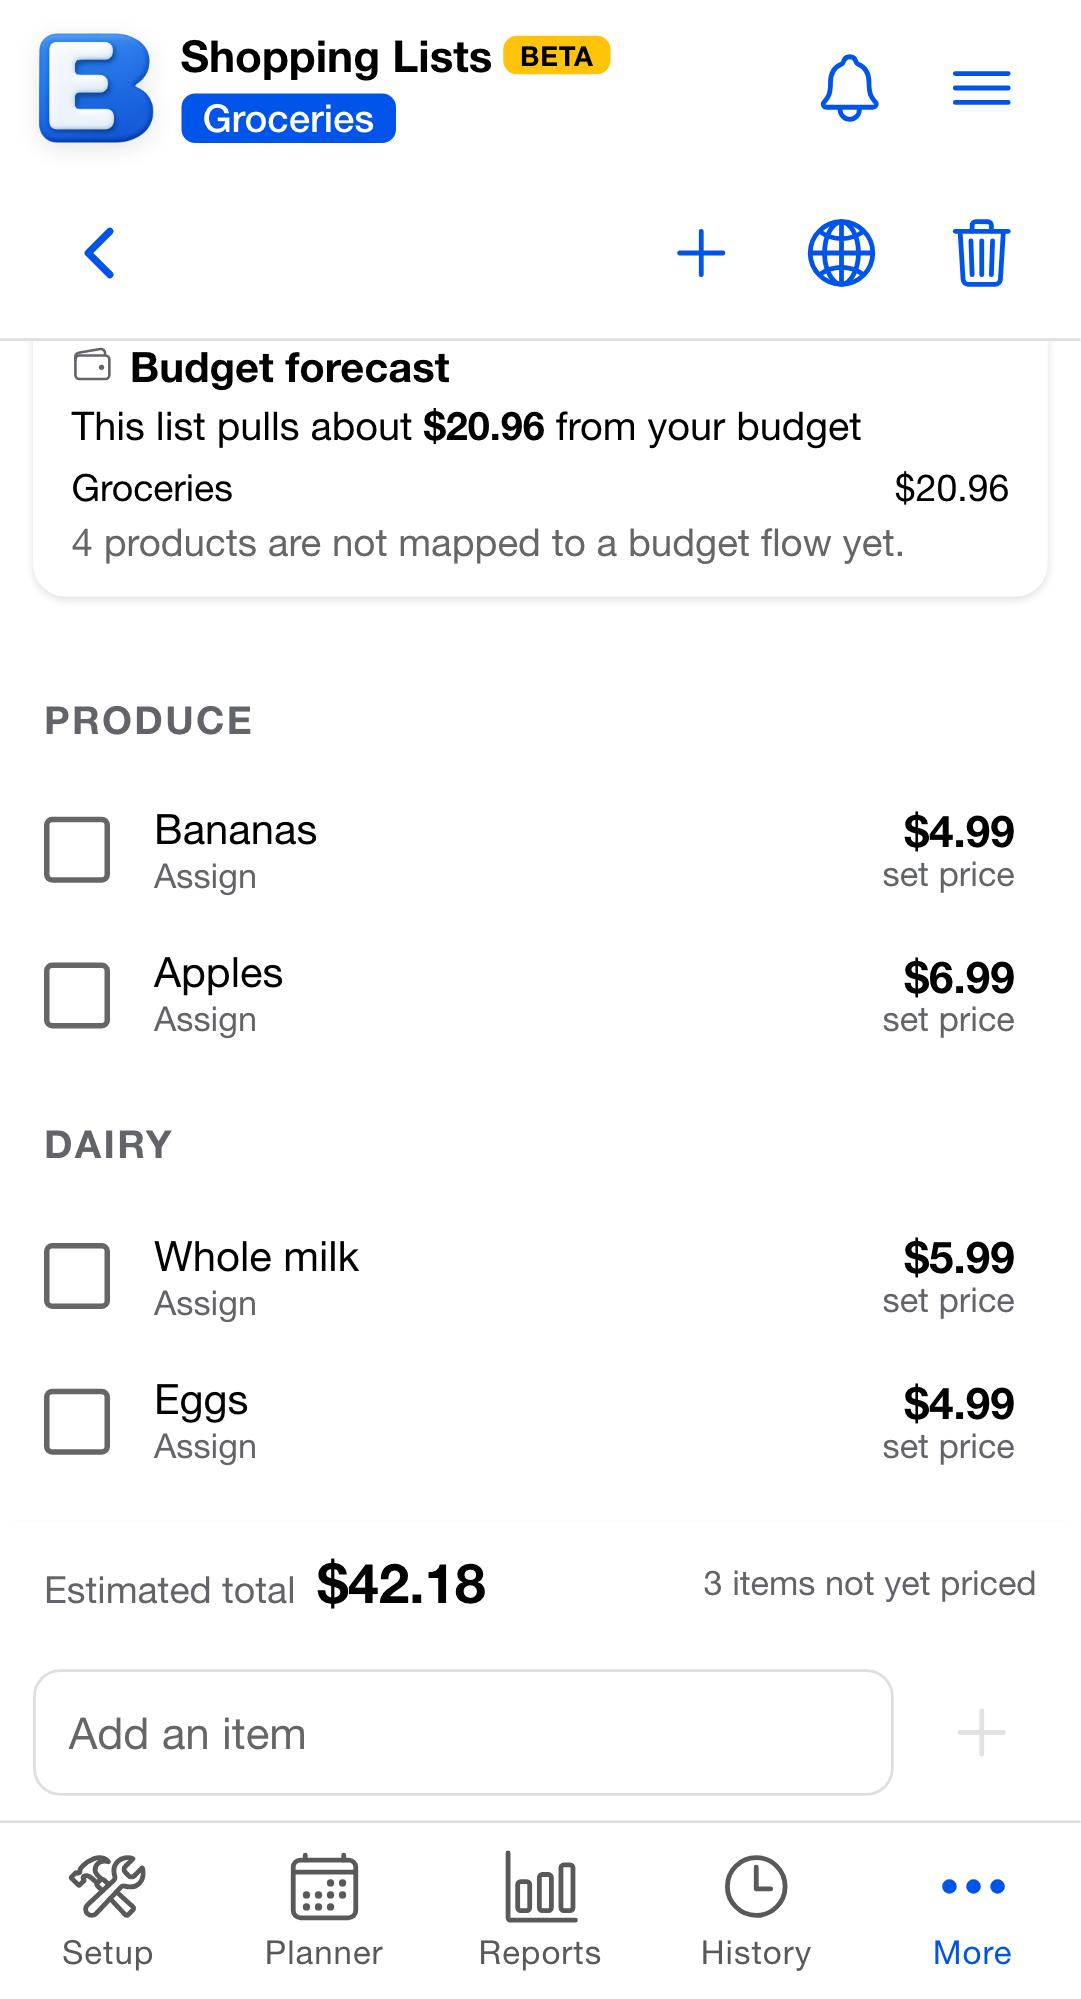
A bar above the add bar keeps a running Estimated total for the list, summed over the items it can price. Beneath it, a line counts how many items are not yet priced, so you know how complete the total is; that line disappears once everything on the list has a price.
The bar is absent entirely on an empty list, and on a list where nothing has a price yet.
Planning the trip
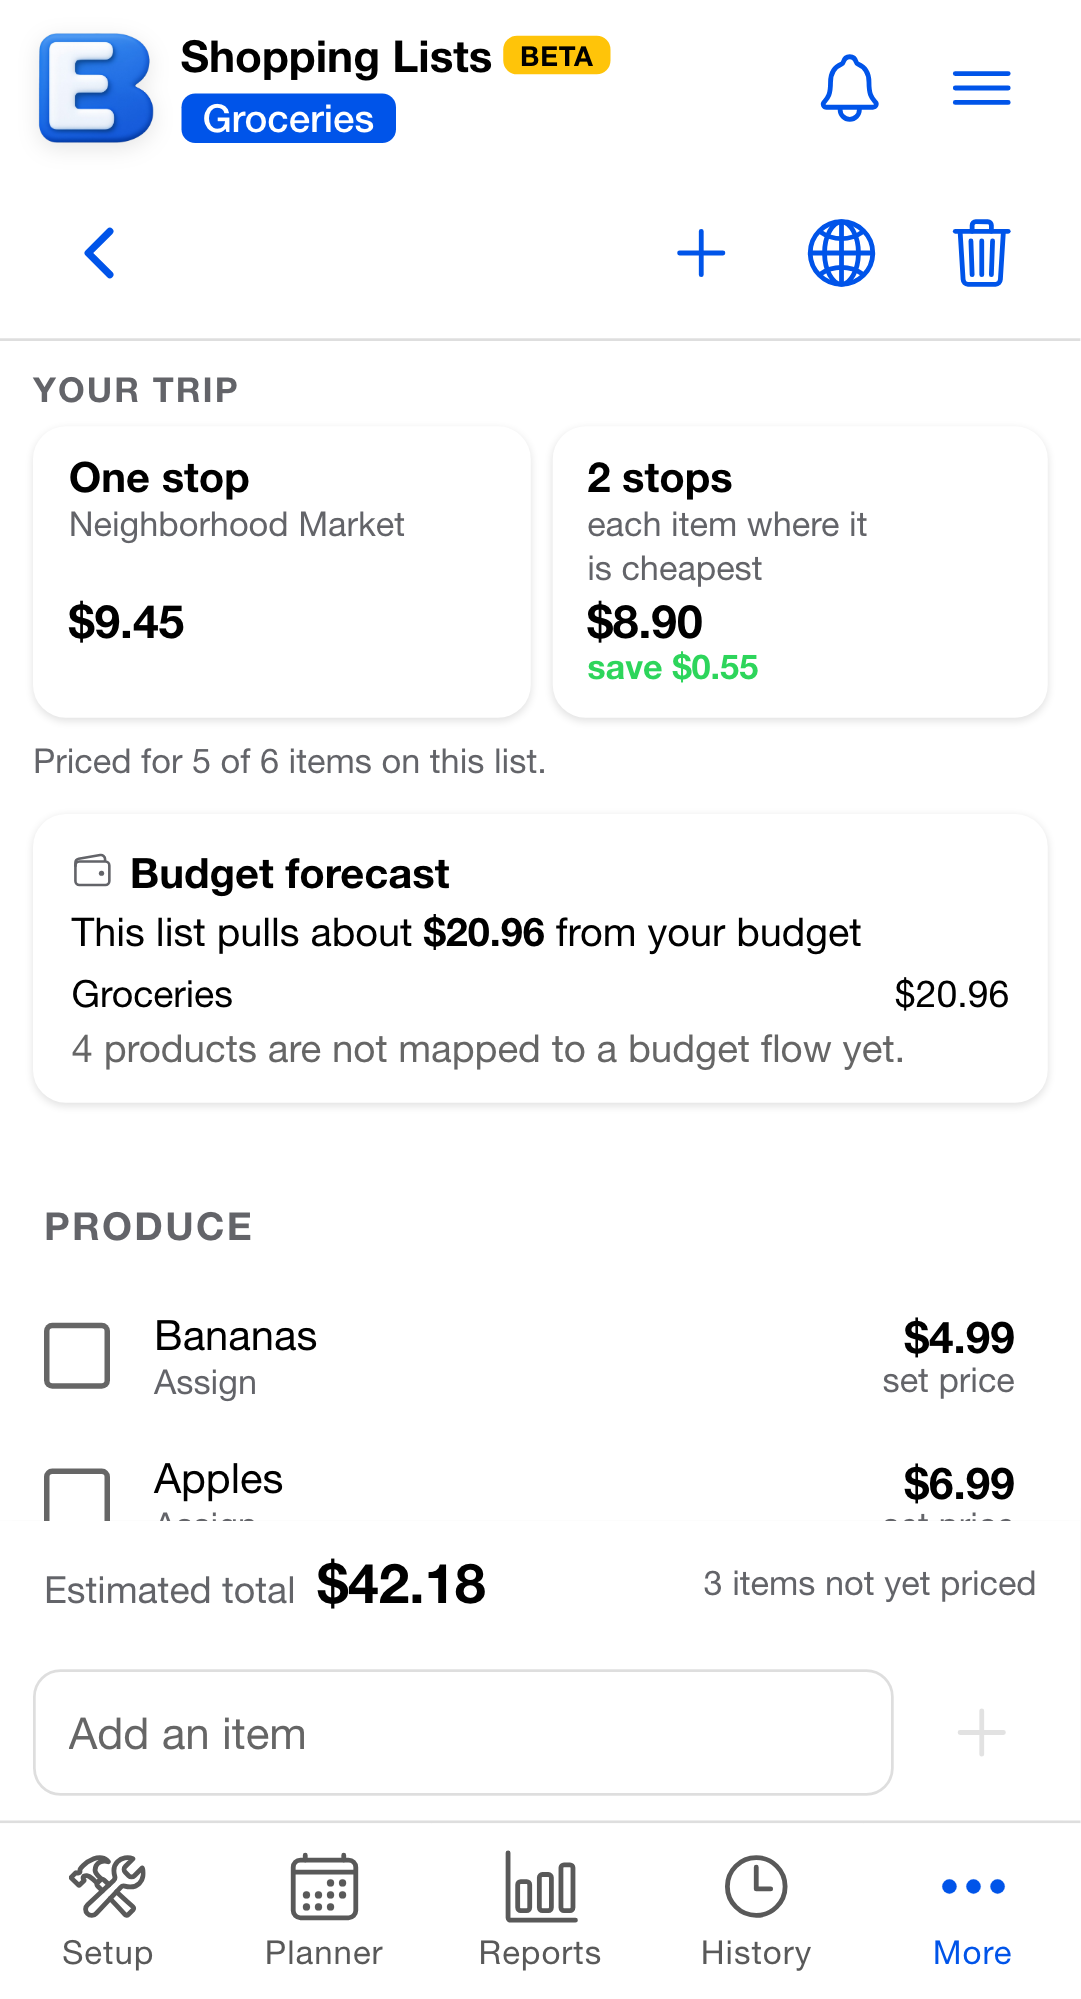
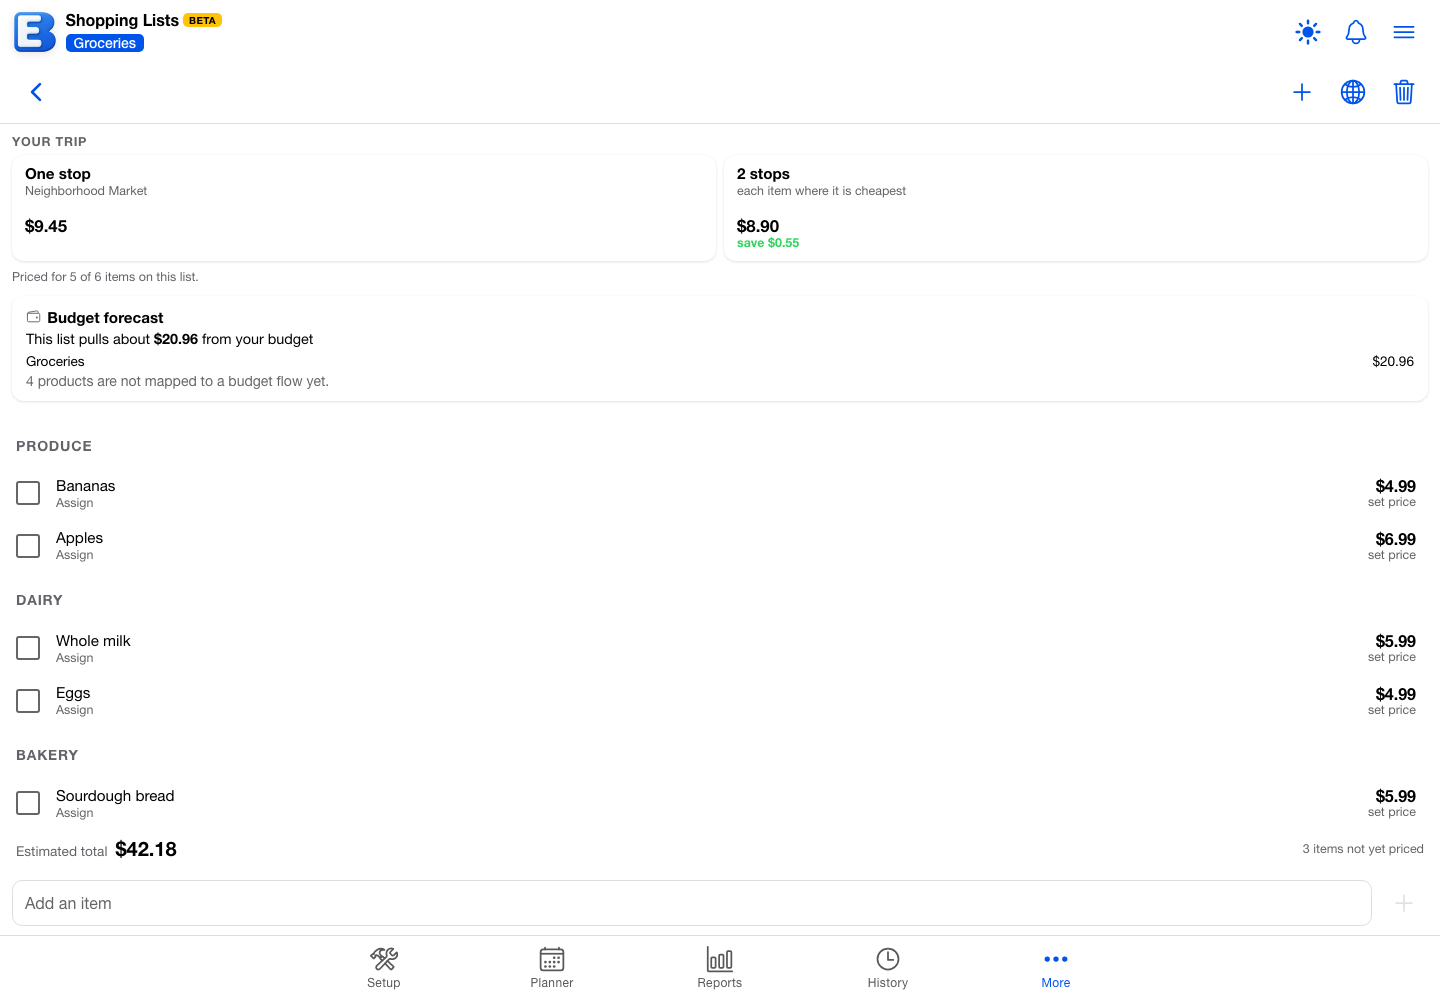
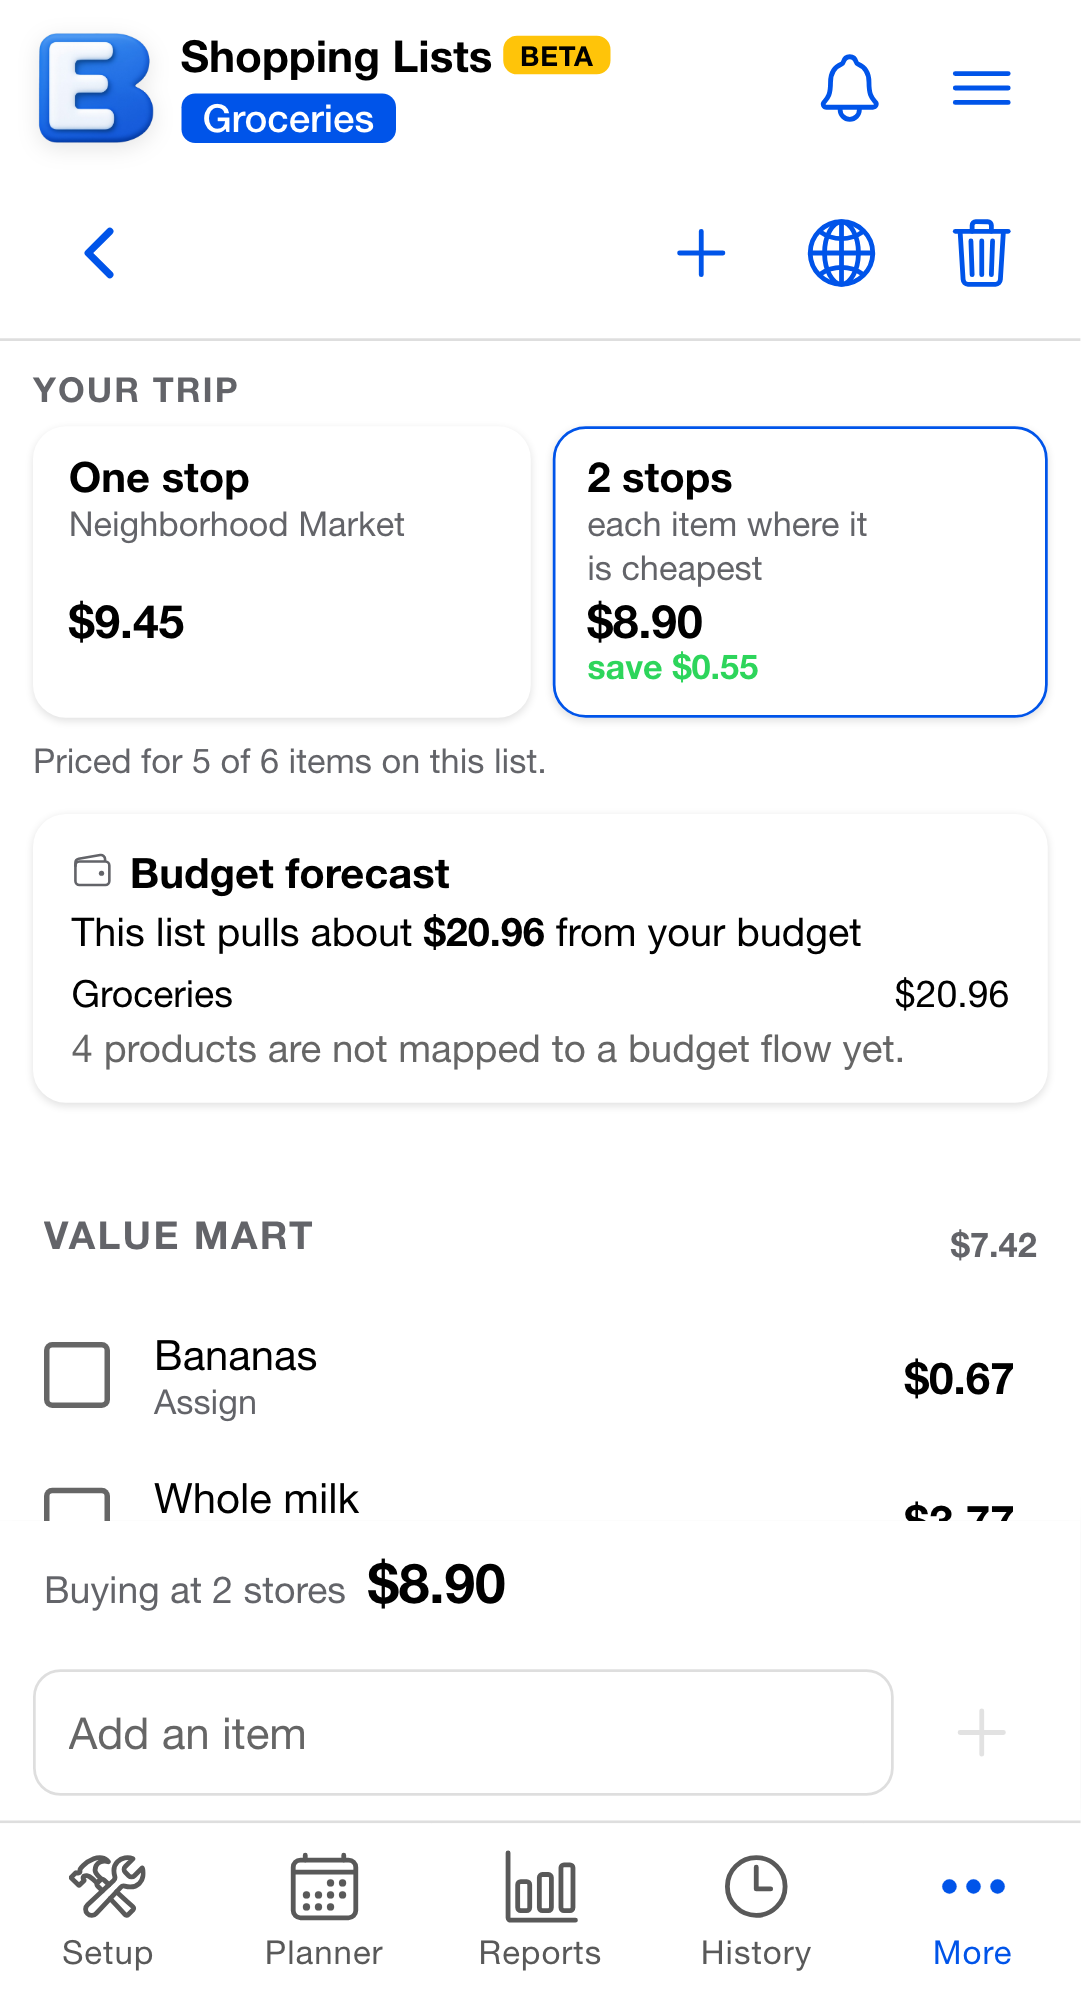
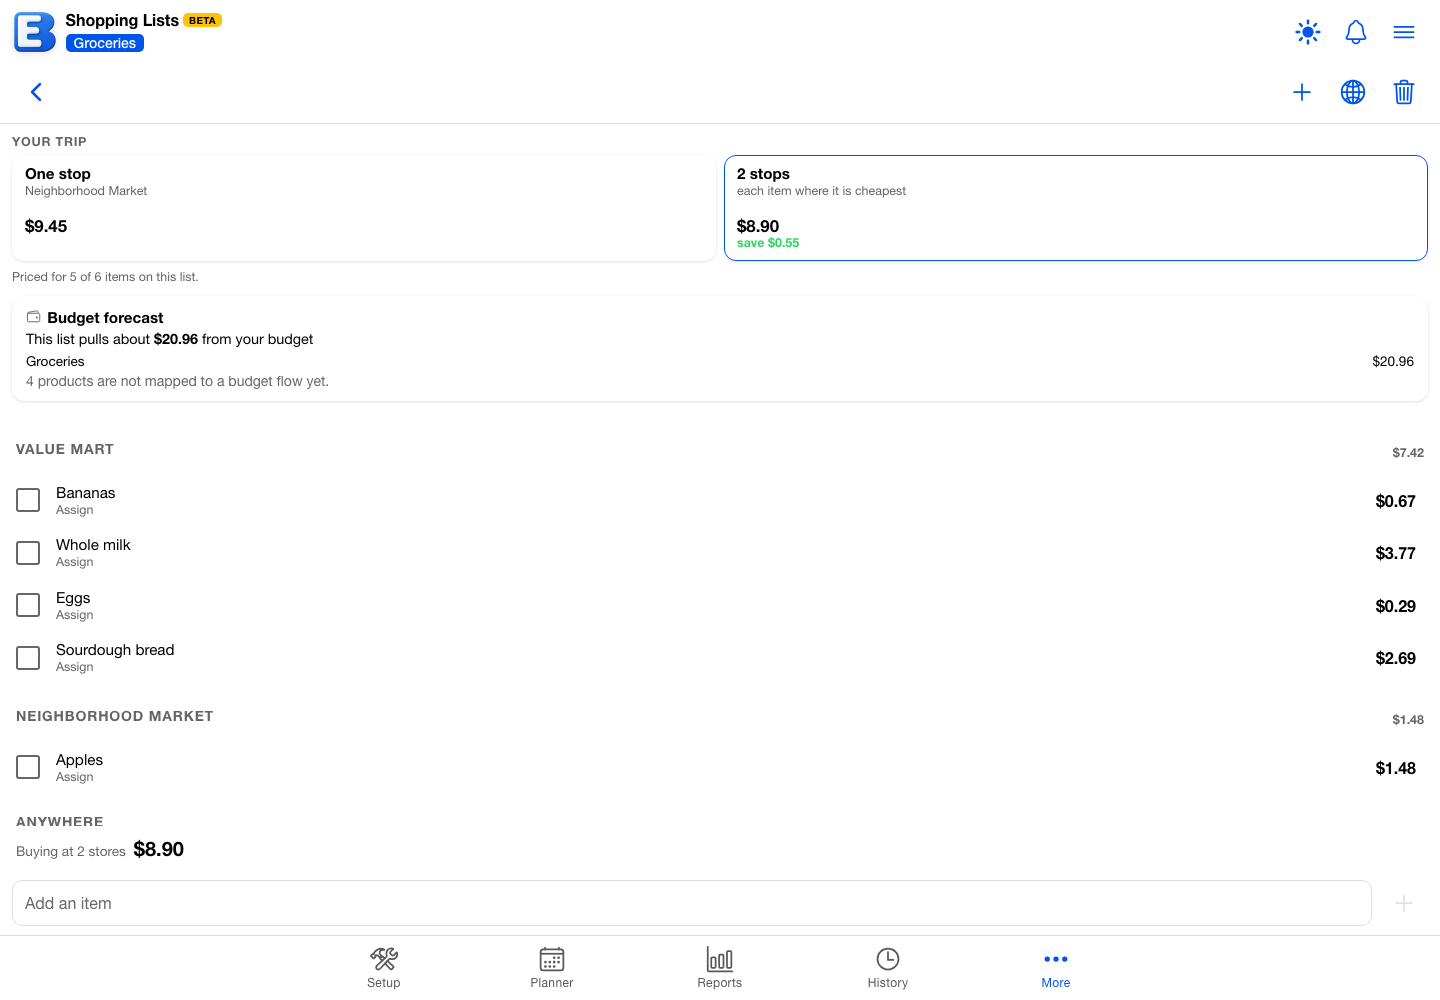
Once your receipts cover this basket at two or more stores, a Your trip bar appears above the list with the decision you actually make before leaving the house: one stop, or several. Both options carry a real total worked out from your own receipts.
- One stop names the single store that carries the most of your basket, with what the whole basket costs there. If that store cannot price everything, the card adds a line like “carries 9 of 11”.
- N stops buys each item wherever it is cheapest, with that total and, when splitting wins, how much you would save.
Tap the option you want. The list regroups to match: one stop keeps aisle order, so you can walk the store, and a split trip regroups into a section per store with a subtotal on each, biggest stop first. Items no store can price gather under Anywhere at the end. Every row then shows what the store it sits under charges, and the bar at the bottom switches to that plan’s total, so the rows, the section subtotals and the total are all the same arithmetic.
Tap the plan you already chose to clear it and return the list to plain aisle order. Your choice is remembered for that list on that device, so picking a trip at home survives walking into the store and reopening the app.
Both totals cover only what your receipts can price, so when part of the basket is missing a price a line under the two options says so, in the form “Priced for 5 of 6 items on this list.” That count covers the items you have still to buy that the app recognizes as products; anything already checked off, and anything you typed that it does not recognize, is outside the trip plan entirely. The basket total above counts differently, over every item on the list, so the two figures answer different questions.
Why does the trip plan sometimes not appear at all? It needs two stores it can genuinely compare. A store has to have bought a product at least twice in the last year before the app treats what you paid as that store’s price, and only purchases in the same unit are compared, so a per-pound price is never weighed against a per-item one. When those rules leave fewer than two stores, the bar is absent rather than showing a comparison built on one lucky shop.
The cheapest single store is the one that covers the most of your basket, with the lower total breaking a tie. Covering more of your list matters more than being cheapest on a handful of items, since a second stop costs you time. The saving shown on the split option compares only the items the one-stop store actually carries, so it is a like-for-like number.
The budget forecast
A Budget forecast card sits under the trip plan once your receipts can fill it. It estimates what this list will draw from your budget, in the form “This list pulls about $20.96 from your budget”, and breaks that down per budget flow, largest first. Beneath it, a note counts the products not yet mapped to a flow. A product is mapped in the Budget flow field of the Edit Product dialog, and the card appears once at least one product on the list is both mapped and priced.
Building a list from a recipe or a past receipt
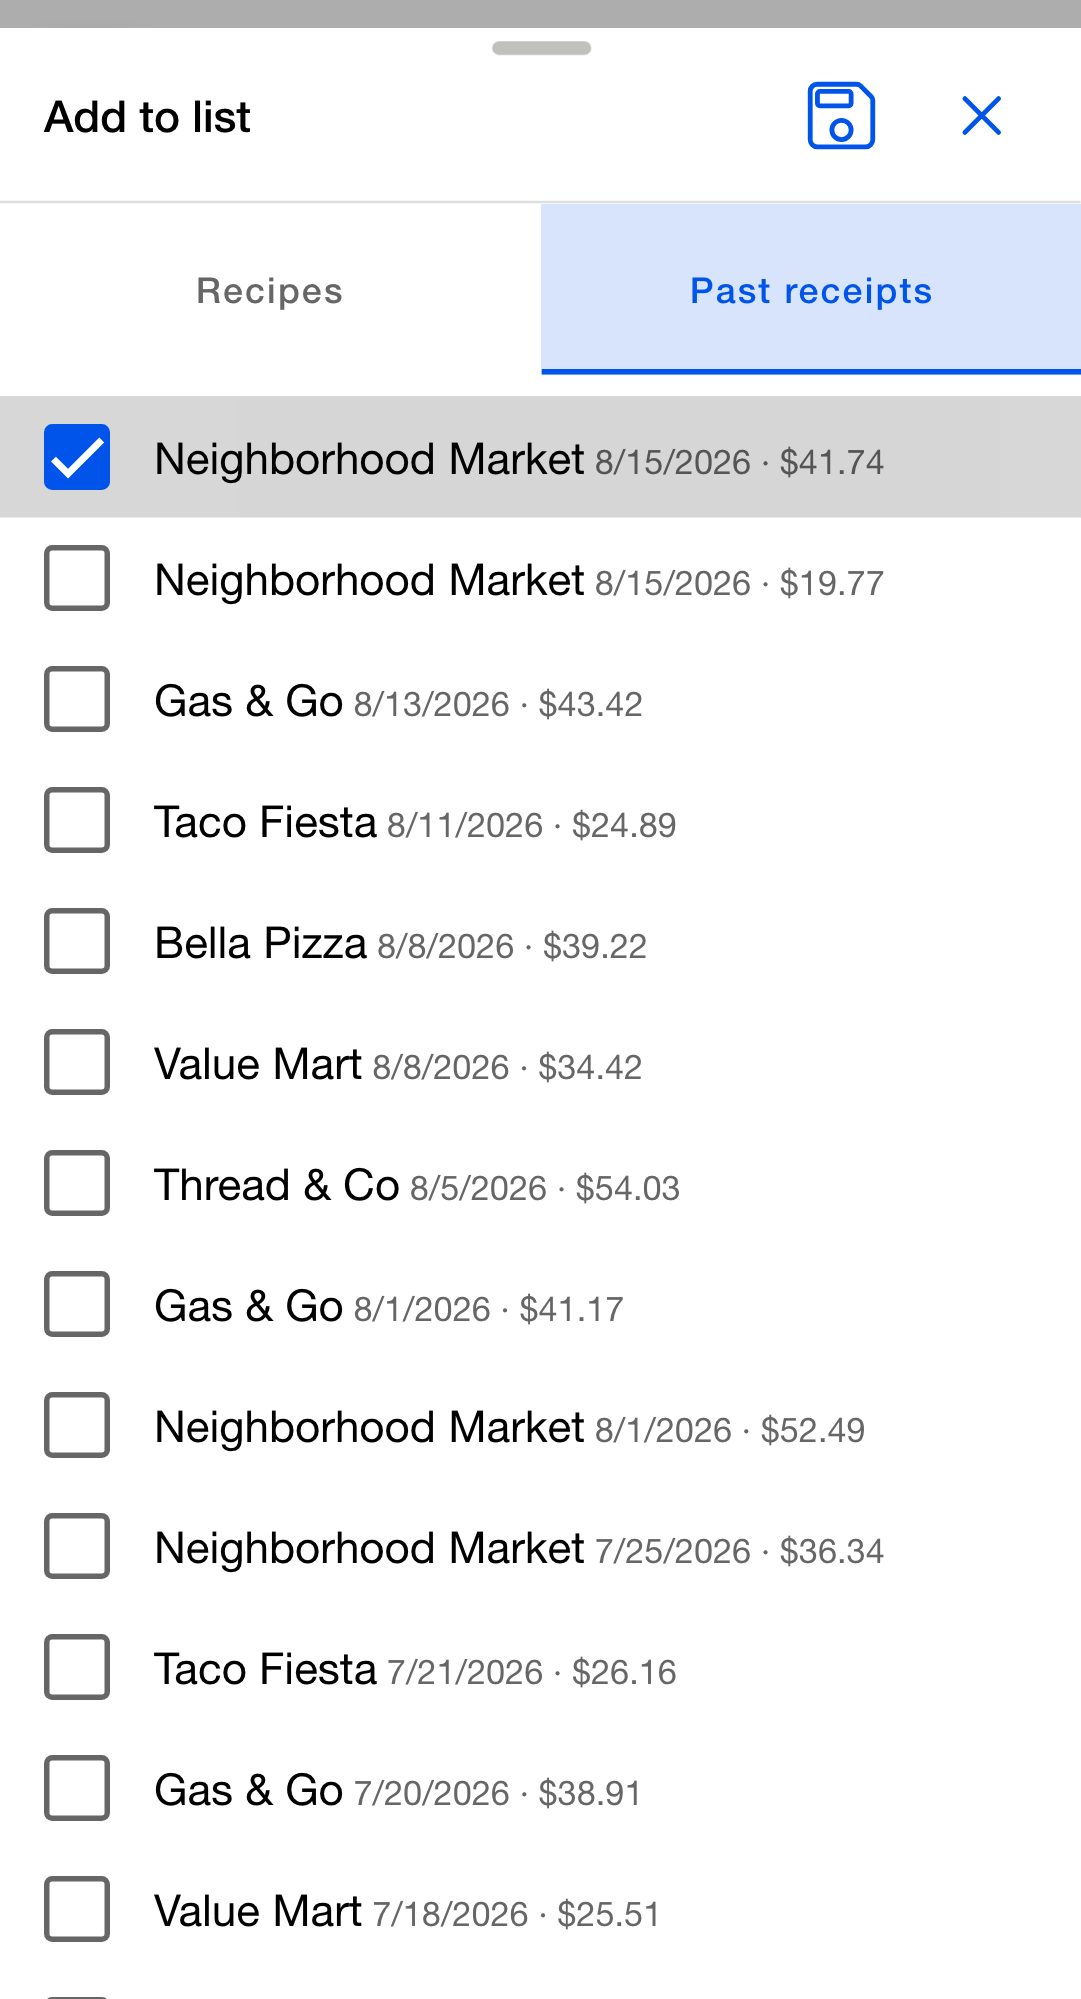
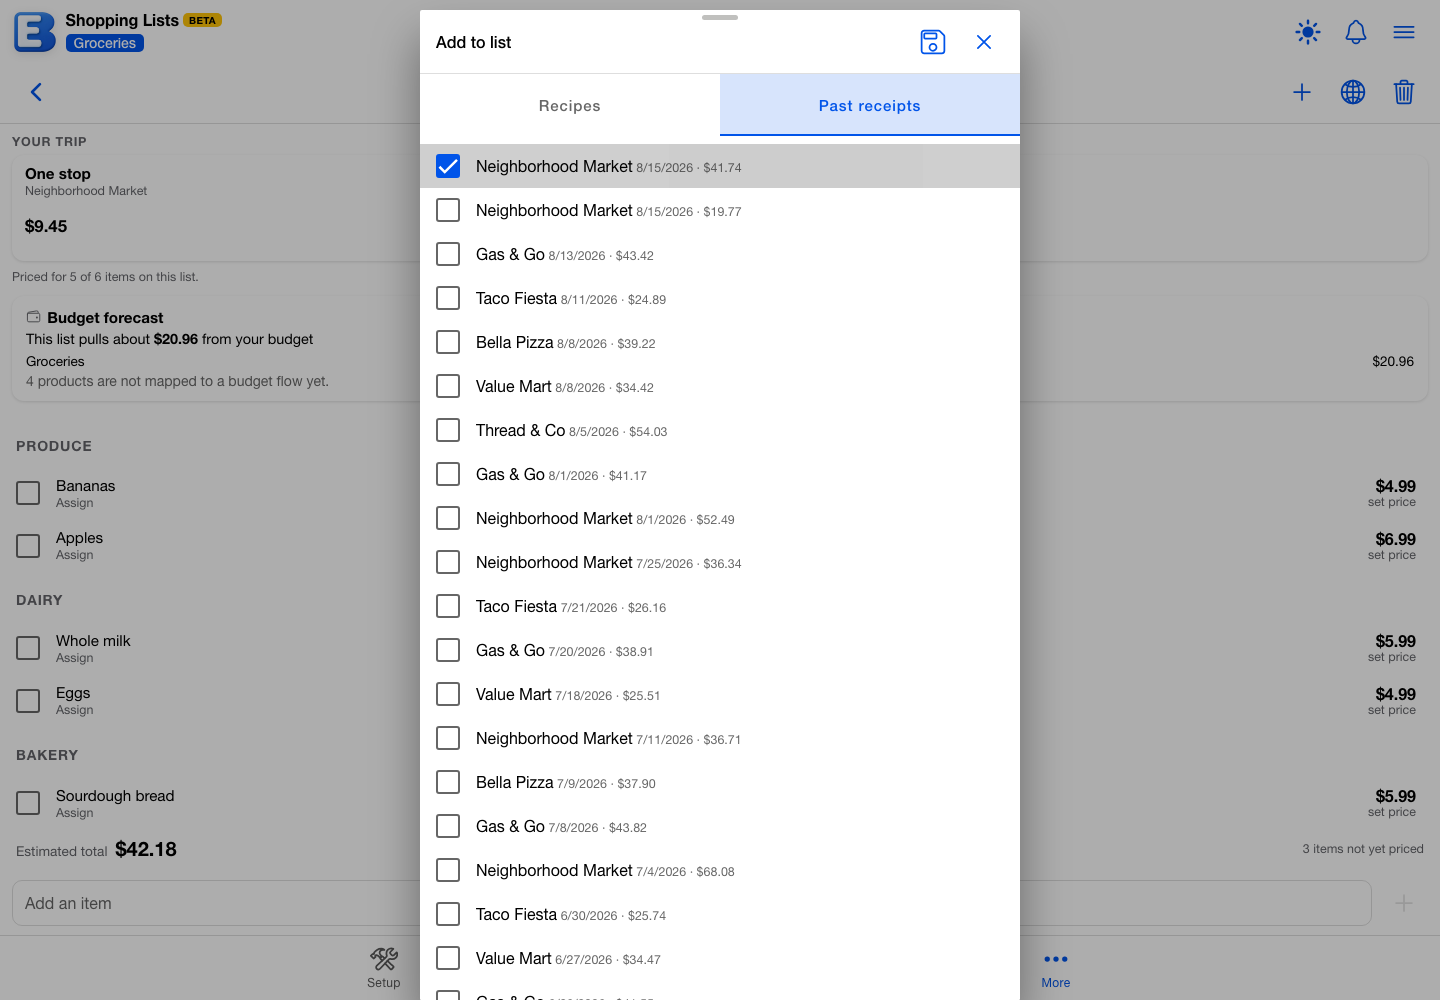
You do not have to type a list from scratch. The + button at the top of an open list, labeled Add from recipe or receipt, opens Add to list, which has two tabs:
- Recipes offers your saved recipes. Their ingredients are added at the amounts the recipe calls for. See Recipes.
- Past receipts offers receipts you have already scanned, each showing the merchant, the date and the total, so you can re-add what you bought. Receipt quantities are used as bought, and discount lines are left out. Only receipts that have finished reading appear here.
Tick what you want on either tab and tap Save. Anything the app recognizes as the same product merges into one line with the amounts added up, so three recipes that all call for eggs become a single egg line. Same-kind measures are converted before they are added up, so a cup and a tablespoon of the same thing combine correctly. Lines the app does not recognize as a known product are added as their own rows and stay unmerged.
When you scan the receipt from your shop
After you check out, scan the receipt the usual way (see Receipts). When that receipt finishes reading, the app checks off the items on your list that it matched and records what you actually paid. A banner appears at the top of the list saying how many items the receipt checked off, and beneath it what you had planned against what the receipt came to, so you can see the gap at a glance. If the app had no estimate for those items, the banner gives the receipt’s figure alone. Dismiss it with the X; it stays dismissed for that list and that receipt on that device.
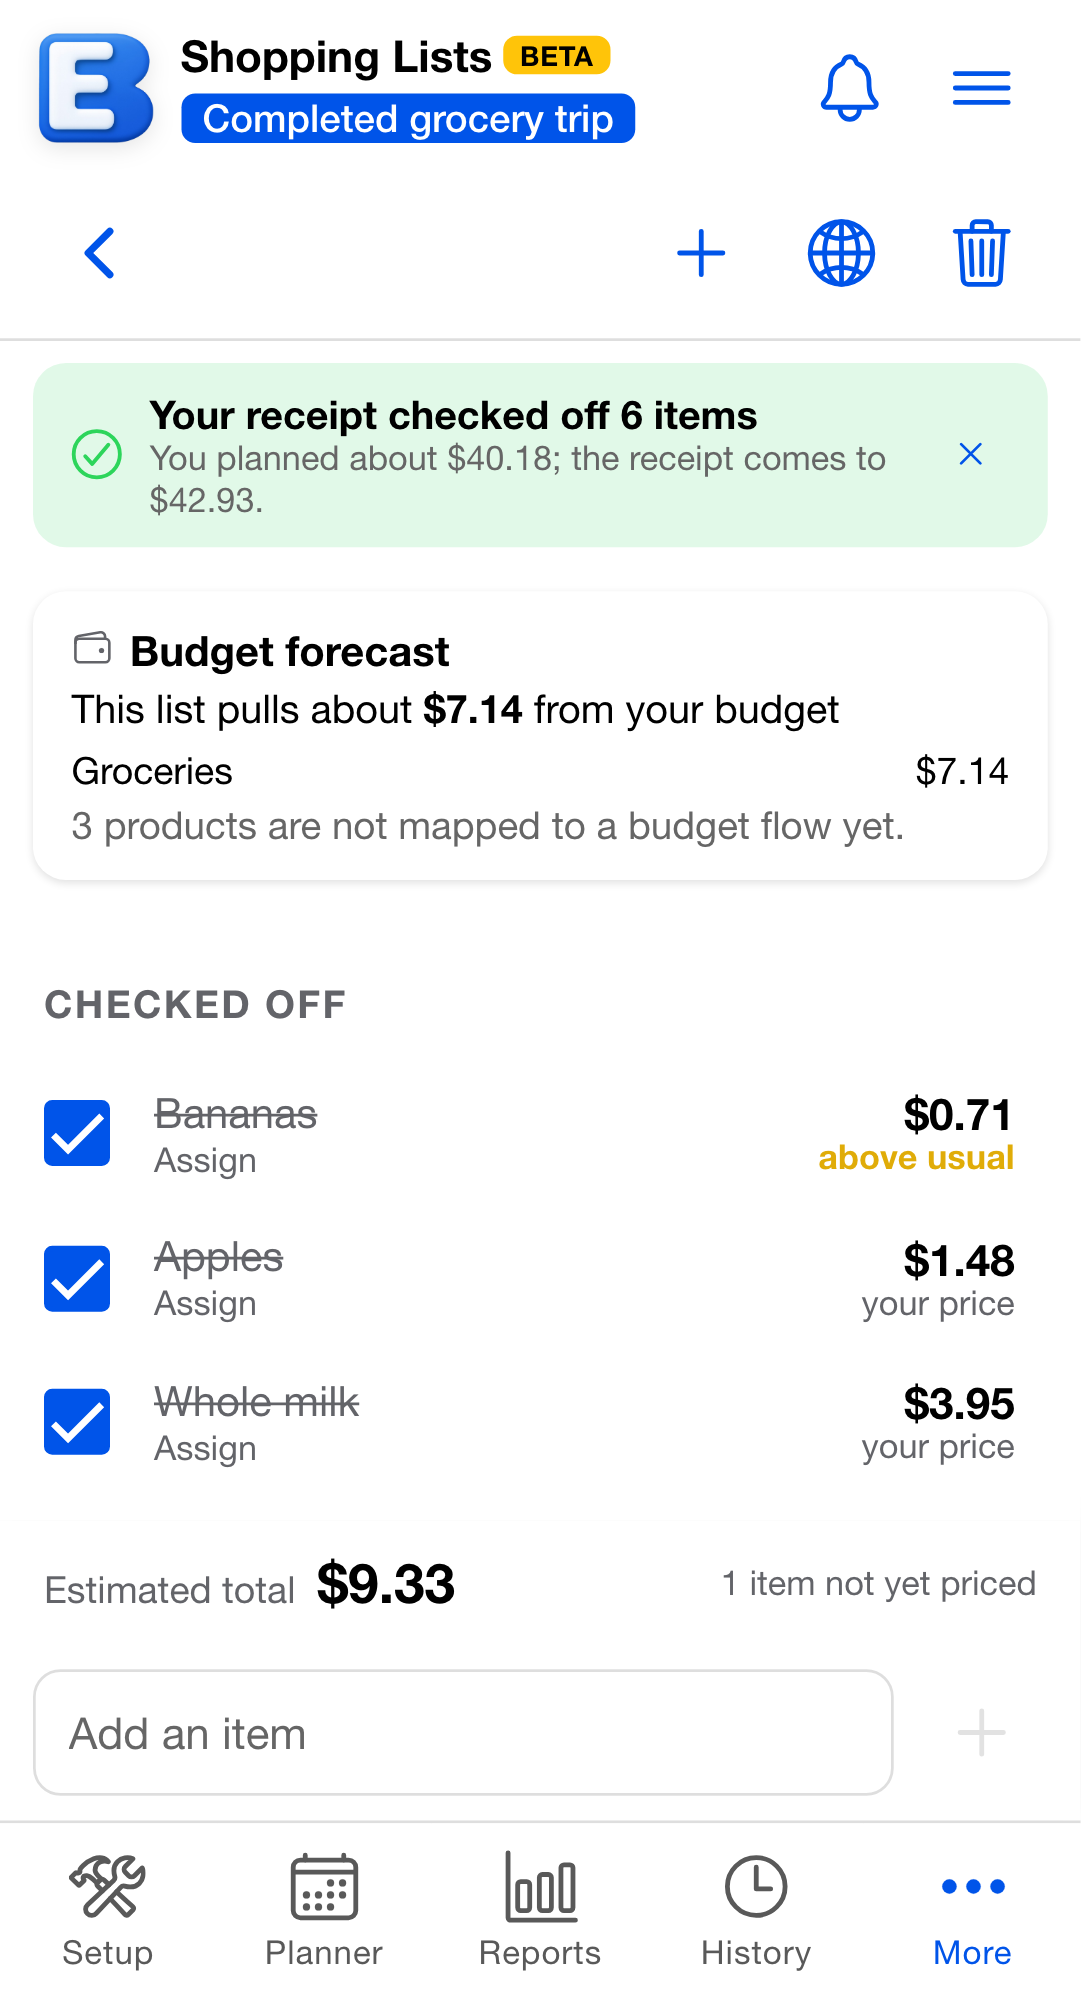
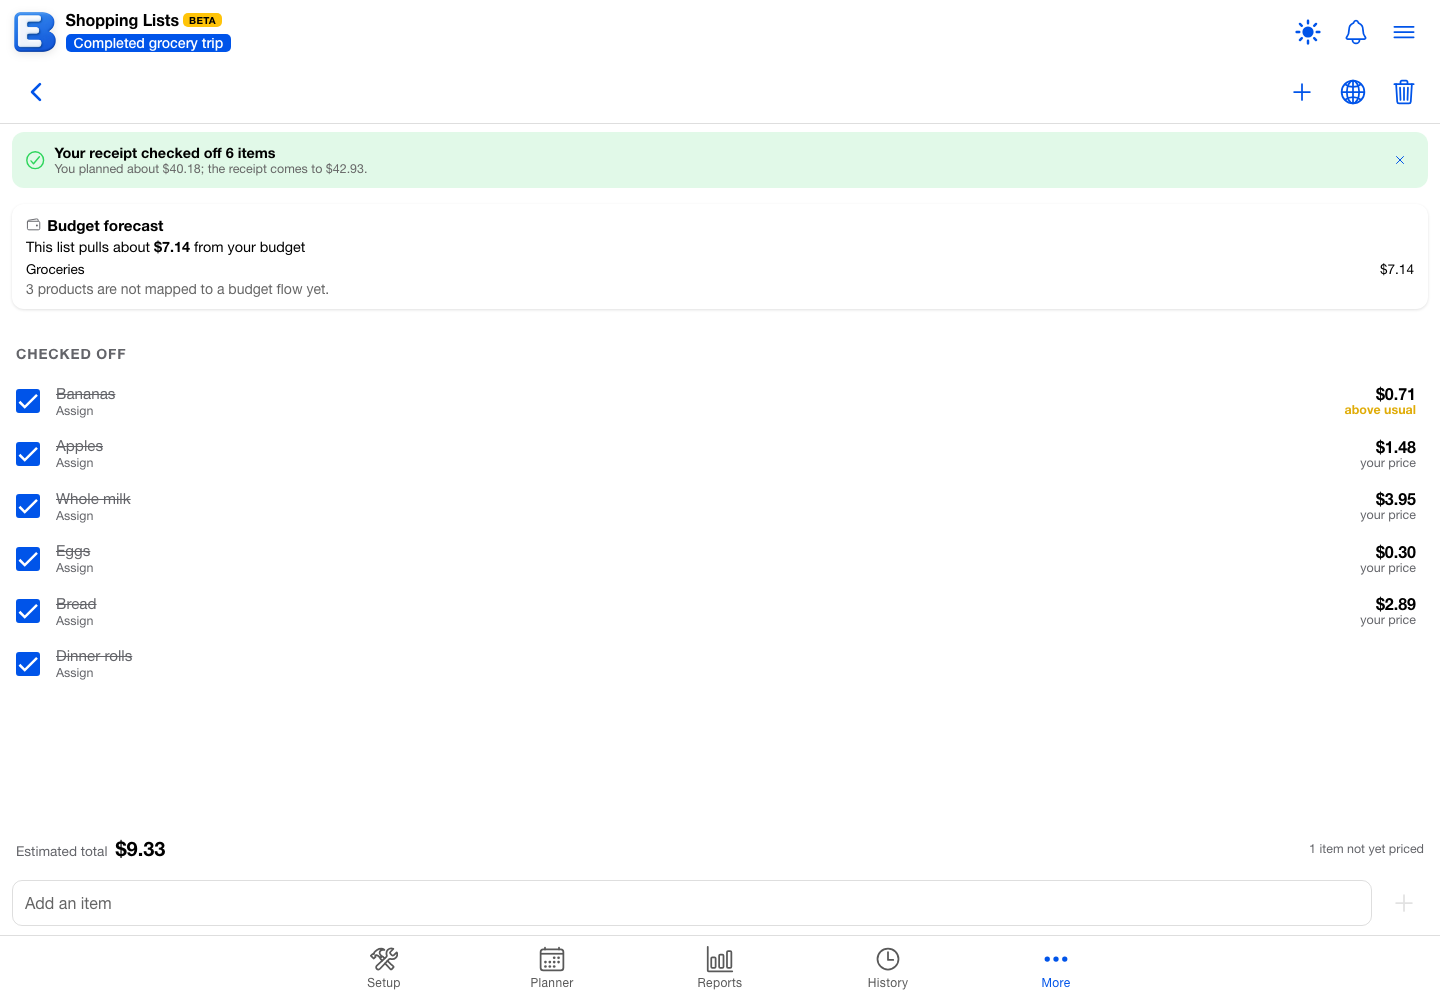
This is a suggestion you stay in control of. The app checks matched items, never deletes anything, and never touches an item you had already checked off yourself; uncheck anything it got wrong. Re-reading the same receipt will not re-check an item you unchecked. It only runs when the budget has exactly one list that is not archived, so it never has to guess which list you meant, and a receipt that is not groceries matches nothing and changes nothing.
The planned figure is what the app estimated for those items at the moment it checked them off, so the comparison holds even after your prices move on.
Sharing a list with your household
A shopping list belongs to its budget, so it is shared exactly the way the budget is. Keep the budget to yourself and the list is yours. Share the budget with your household (Sharing) and everyone with access sees the same lists, with changes showing up live: an item one person adds or checks off appears for everyone.
Prices on a shared list come from the budget’s receipts, so everyone on the budget sees the same numbers. The one part that can differ between people is a community estimate, which is based on the area each person has saved.
Reading a list needs view access to the budget. Adding items, checking them off, assigning them, and deleting them all need edit access.
Assigning and claiming items
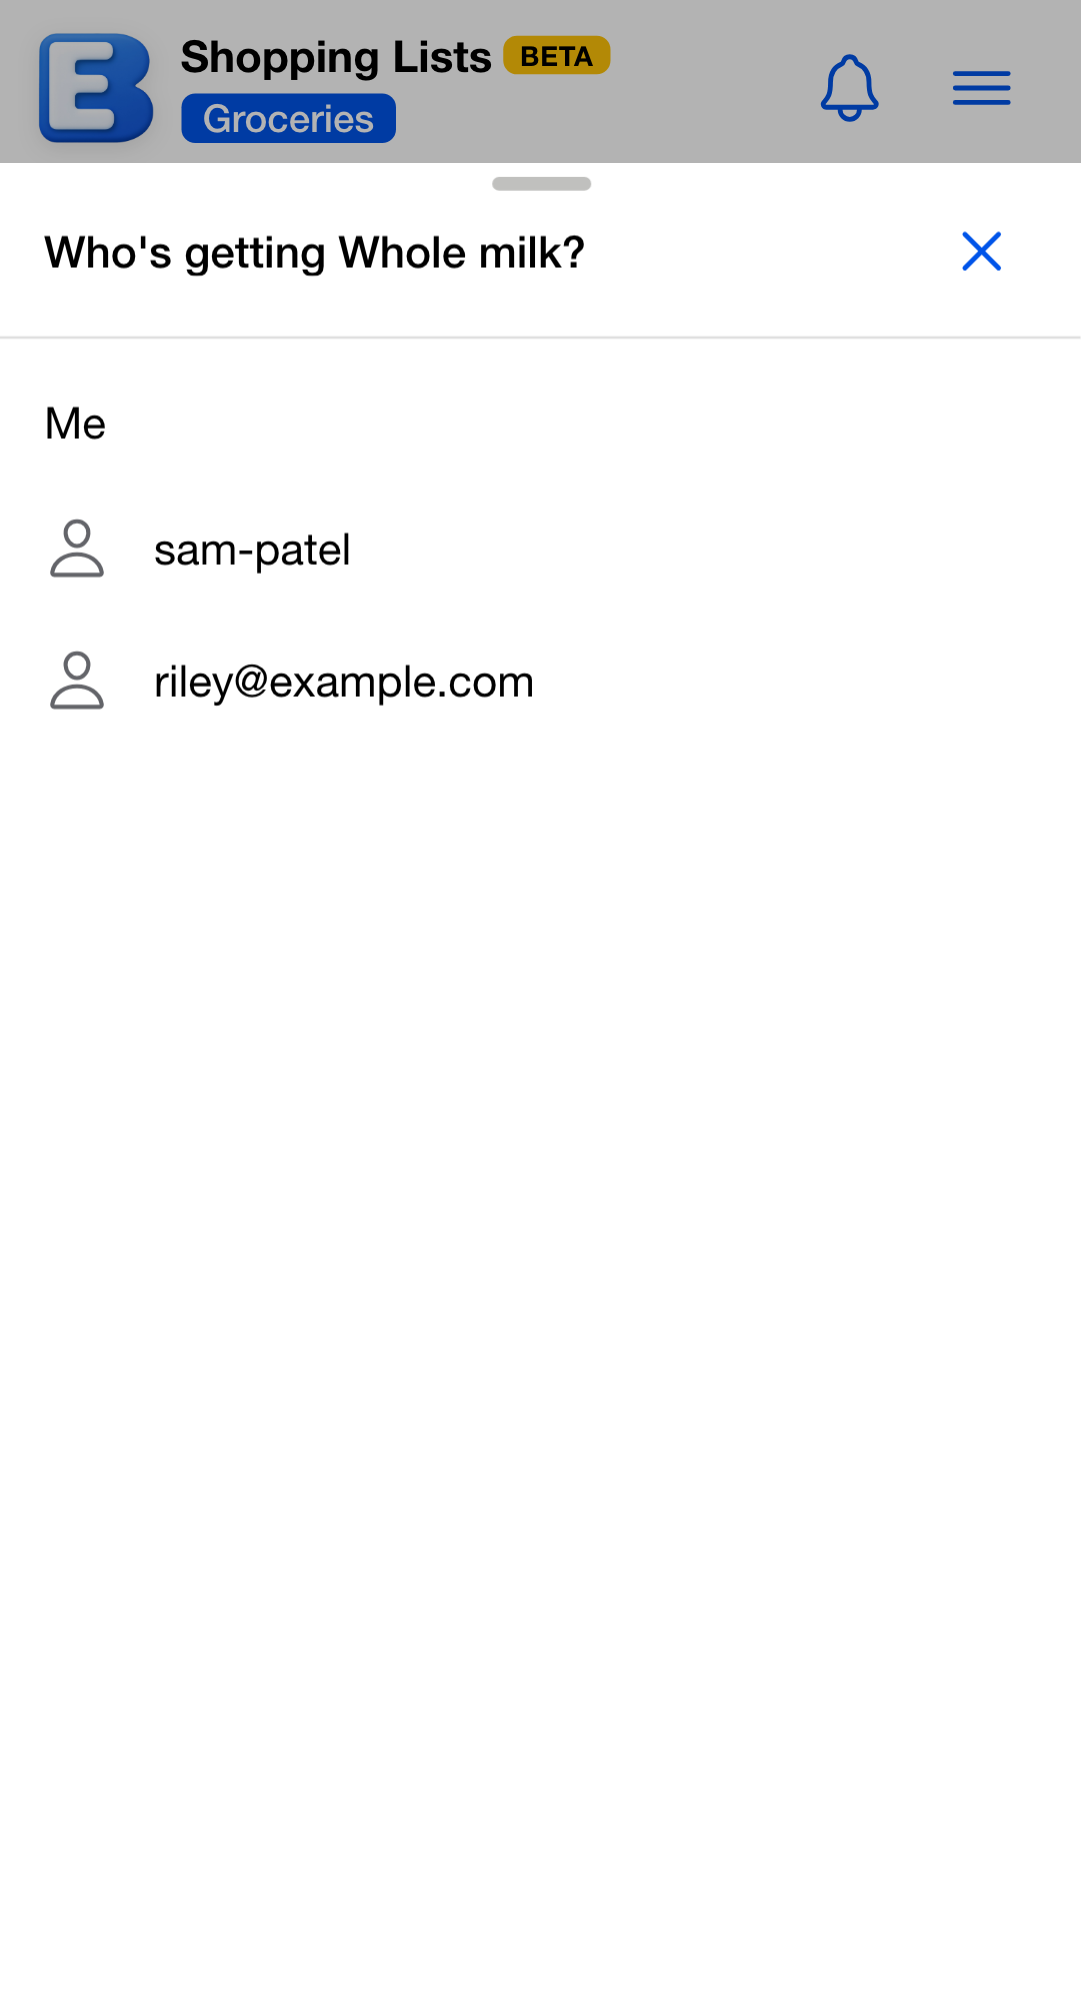
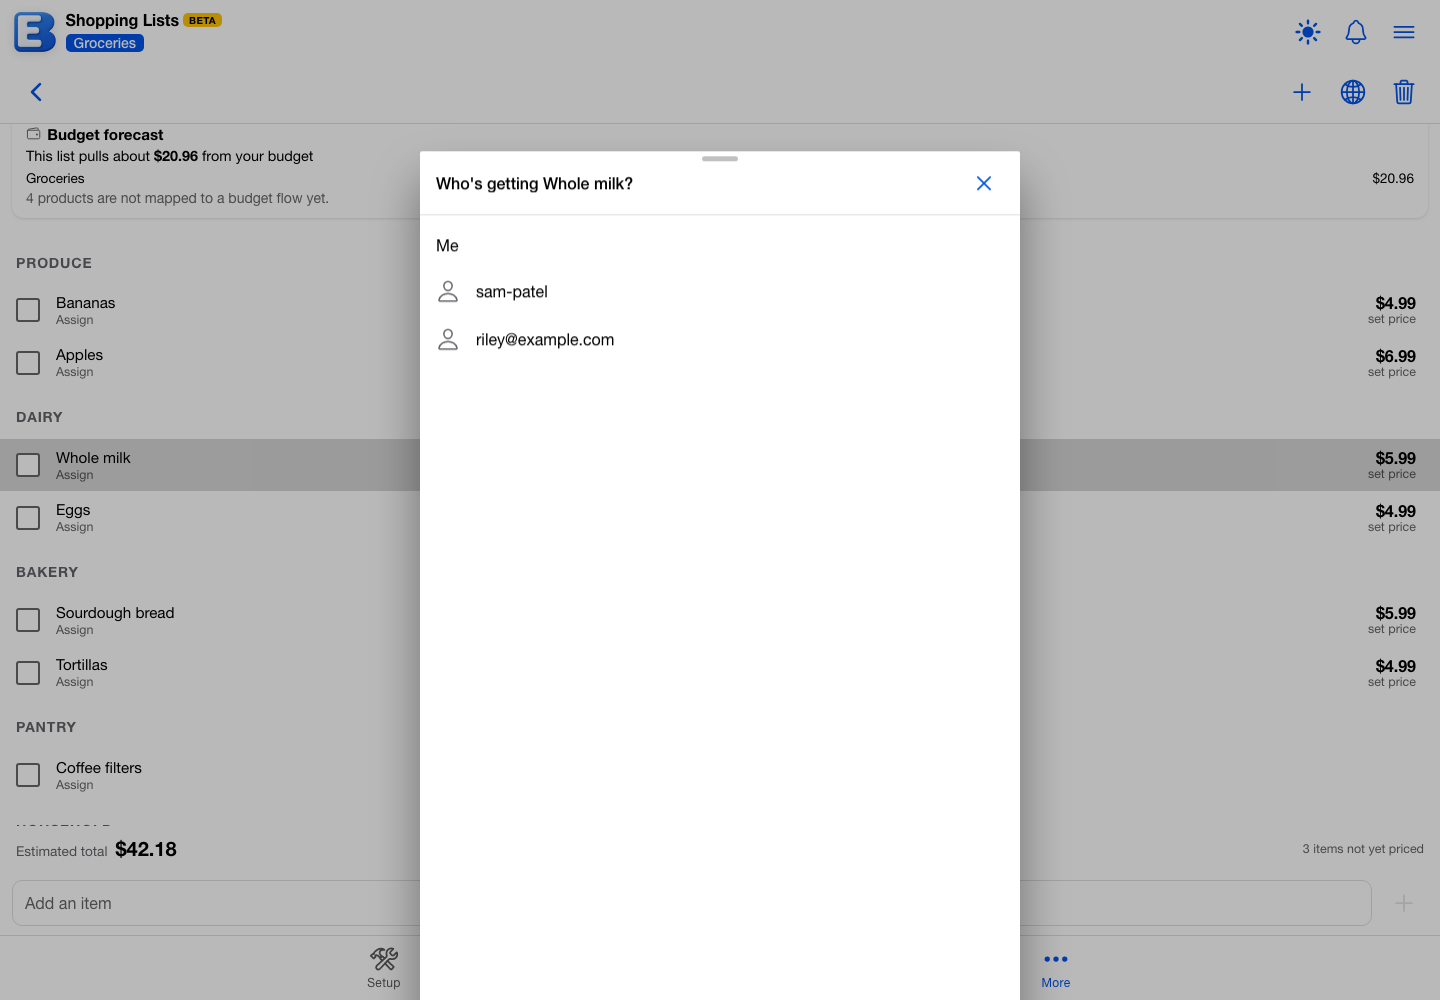
On a shared budget you can split the shopping up. Each row carries an Assign control. Tap it to open a sheet titled “Who’s getting Whole milk?”, then choose Me to claim the item, pick a household member to hand it to them, or choose Unassign to clear it. The choice takes effect the moment you tap, with no save step. The row then reads For you, or For and the person’s name.
Anyone with edit access can assign any item to any member of the budget. Someone with view-only access can still claim an item for themselves.
Publishing a list
You can publish a list to a public link so anyone can open it and add it to their own budget, without sharing your prices or which stores you shop. The globe button at the top of a list, labeled Publish list, starts it. Publishing, and importing a list someone shared with you, are covered on Publishing and importing lists and recipes.
Quick reference
| If you want to | Do this |
|---|---|
| Open shopping lists | Open the budget, tap More, tap Shopping Lists. |
| Open one list | Tap the chevron at the end of its row. |
| Create a list | Tap the + button (New shopping list), enter a List name, tap Save. |
| Rename, archive, or delete a list | Swipe the list row left, tap Rename, Archive, or Delete. |
| Bring an archived list back | Switch to the Archived tab, swipe the list, tap Restore. |
| Reorder your lists | Press and hold the handle at the left of an active row and drag it. |
| Add an item | Type in the Add an item bar and press return, or tap a suggestion. |
| Edit an item or set its price by hand | Tap the row, change it in the Edit Product dialog, tap Save. |
| Check an item off | Tap the checkbox at the left of the row. |
| Choose between one stop and a split trip | Tap One stop or the N stops option in the Your trip bar. |
| Go back to plain aisle order | Tap the trip option you already chose. |
| Add a recipe’s ingredients or a past receipt | Tap the + button on the open list, choose Recipes or Past receipts, tap Save. |
| Share a list | Share the budget it lives in; see Sharing. |
| Hand an item to someone | Tap Assign on the row, pick the person, or pick Me to claim it. |
Related pages
- Receipts: scanning receipts, which is what fills in your prices, checks your list off after you shop, and powers the trip plan and the re-buy suggestions.
- Recipes: saving meals as recipes, what each costs to make, and adding a recipe’s ingredients to a list.
- Publishing and importing lists and recipes: publishing a list to a public link and importing one someone shared.
- Sharing a Budget: sharing the budget a list lives in, and the view and edit access levels that decide who can change it.
- Subscription: what is free and what Premium adds. Shopping lists and everything on this page are free.
Questions or feedback about this page?Email us.